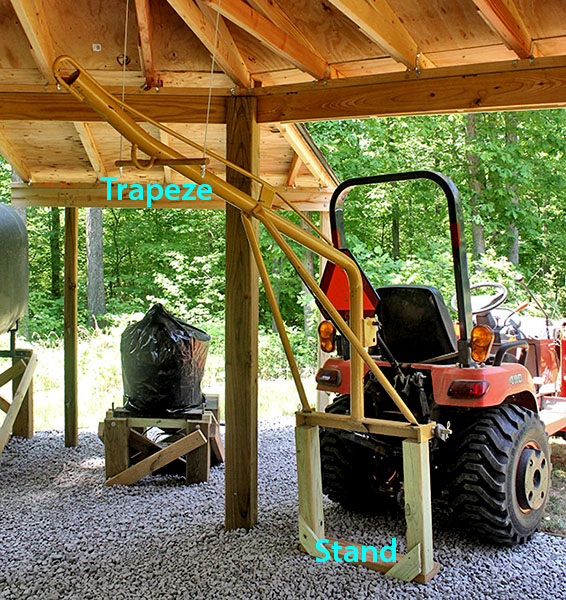
The boom pole has been lowered to rest on the stand and the trapeze, and is ready to be disconnected from the tractor.
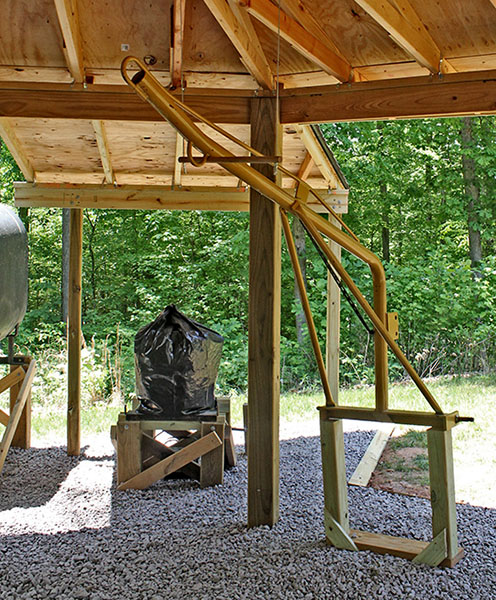
The stored boom pole. The stand is nailed to the ground with two 1' lengths of rebar, and is much more stable than it appears.
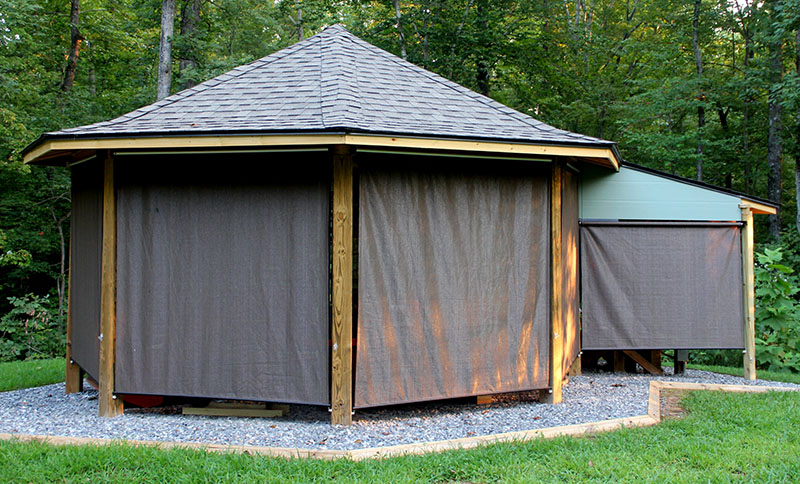
We built a shed to store our Kubota BX-2360 subcompact tractor and implements. This page has photos of the finished shed and the implements. Click the blue button above to see how we built the shed, from bare ground to the finished structure.
The shed is an octagon measuring 16¾ feet apex-to-apex that resembles our 18-sided (round) house. There are eight 6x6 corner posts with a 2x6 beam around the top to hold a dual-pitch (6:12 above 3:12) self-supporting truss roof, similar to the roof on the house, that needs no center post.

Each bay has a 71" opening between two posts. Seven bays are open, with pull-down exterior shades to shelter the implements. The eighth bay is blocked by a diesel generator, sheltered by a roof extension with two additional shades.
Each shade is 6' tall, so the bottom gap varies with the sloping ground.
The shed has a surprising amount of interior space, especially headroom, thanks to the self-upporting roof. The implement bay openings have between 6'-6" and 7'-7" vertical clearance (the ground slopes toward the south). The roof trusses rest on a 2x6 perimeter beam, so the lower chord is 5½" above the bay openings.
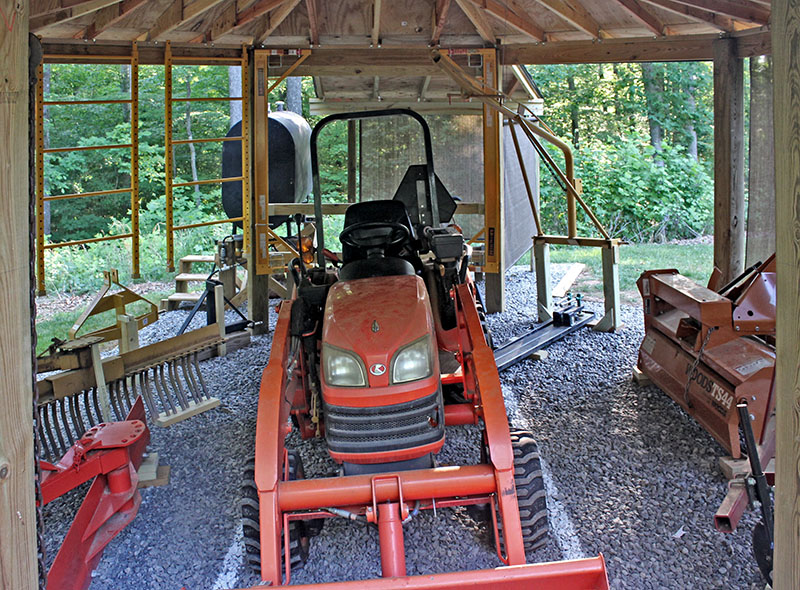
Headroom at the center of the shed is 9'. The tractor deck is about 18" high, leaving 7'-6" headroom above it – plenty of room to stand up on the tractor. You can get a sense of the headroom from this photo. On the far right side you can see a yellow boom pole supported by a trapeze hanging from roof trusses. Scroll down to learn more about implement storage.

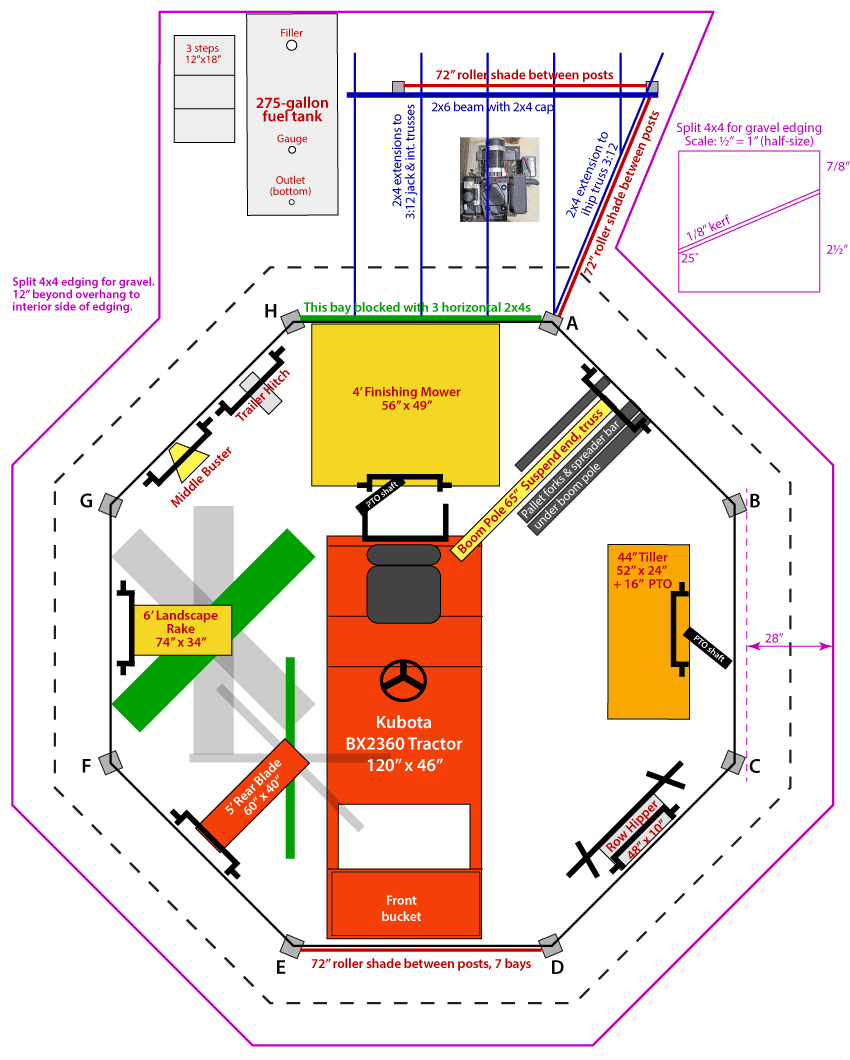
This drawing shows the shed's floor plan and where equipment is stored.
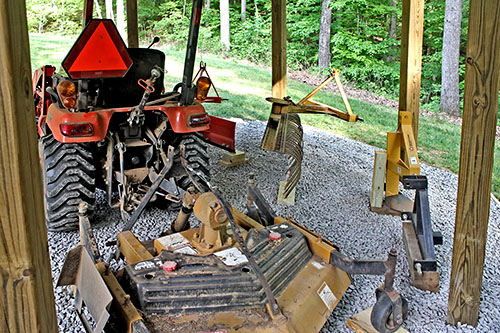
Implements are stored in six bays, hitches facing outward, so the tractor can pick up and drop them from outside the shed. The tractor occupies the seventh and part of the eighth bays. A finishing mower is stored in the eighth bay directly behind the tractor, hitch facing inward, so it is attached and detached inside the shed.
The rear blade and the landscape rake must be rotated 45°, shown by the green lines, so they will fit through the bay opening and also clear other implements. The gray positions won't work.
The dashed black line represents a 17" roof overhang.
The pink line encloses a 2½"-thick gravel floor extending 12" beyond the roof drip line. The edging was made by ripping 4x4s at a 25° angle. The angle provides a short ramp for the tractor to drive onto the gravel. The edging is "nailed" in place with 2' lengths of rebar driven into the ground.
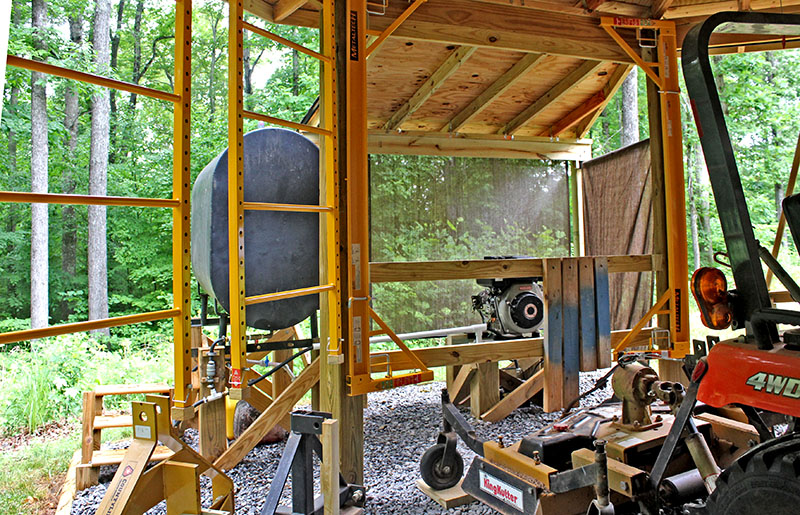
A 6 KW diesel generator and a 275-gallon diesel fuel tank are outside the shed behind the tractor and the finishing mower. The generator is mounted to a platform 20" high. The fuel tank is raised on 6x6 posts high enough to gravity-feed the generator and the tractor fuel filler. Three steps allow access to the tank's top fittings.
One sector of the shed's 3:12 roof extends to shelter the generator. Two sides of this extension have pull-down shades just like the shed's seven bays.
The drawing and the photo above dramatically illustrate a major benefit of the self-supporting roof with no center post – the 10' tractor can be parked in the center of the 16' shed.
Another benefit comes from the octagonal shape, which encloses 196 square feet. A rectangular shed to store the same equipment would need four 6' bays on each side, making it 25' long. It would need to be 11' deep to accommodate the tractor, so the enclosed area would be 275 square feet – 40% larger.
Each implement needs "landing pads" to rest on, and possibly a cable and hook from the roof.
Explanation: A major function of this tractor shed is to store implements so they can be picked up and dropped (attached to and detached from the tractor) quickly and easily.
If an implement's hitch rests on the ground when stored, it must be lifted to reach the tractor's three-point hitch (3PH) – usually inconvenient, and sometimes physiclally daunting. A stand could support the hitch at the right height, but would likely be in the way when moving the implement to and from storage.
We wanted a system where an implement is stored with its hitch at a reasonable height, with nothing to impede it.
We dropped a 1/8" steel cable with a hook from a roof truss to support the implement's hitch. The implement itself rests on wooden pads "nailed" to the ground with 1' lengths of rebar.
This is the shed interior and the implements, with the same orientation as the floor plan above. The list below shows, clockwise from the upper-right, what the eight bays hold. Click a blue implement name to quickly see a closeup. Click your browser's Back button to return here.
The following photos show details of storing these implements.
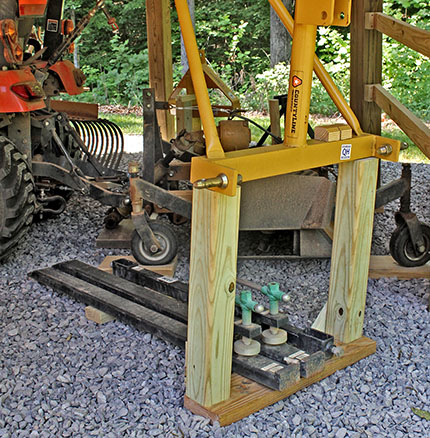
The boom pole is a special case. Mike grew tired of lifting the heavy pole with one hand while trying to align the top link's hole and insert a clevis pin with the other hand. He wanted it stored in a position that allows easy attachment to the tractor and is clear of other implements and people moving about.
Our solution was to support the boom pole on a "trapeze" suspended from roof trusses. It doesn't interfere with the parked tractor, and is high enough to walk under.
We built a stand from 4x4s to support the hitch, aligned for quick and easy tractor pickup and dropping. When ready to store the boom pole, we raise it, back the tractor into position, and lower it onto the trapeze. The hitch lands on the wooden stand at the same time the pole meets the trapeze.
|
The boom pole has been lowered to rest on the stand and the trapeze, and is ready to be disconnected from the tractor. |
The stored boom pole. The stand is nailed to the ground with two 1' lengths of rebar, and is much more stable than it appears. |
These pallet forks clamp onto the tractor's front-end loader bucket. We store them beneath the boom pole.
Our 44" tiller needs only two landing pads – there is no need for a cable to support anything. Two layers of 2x6 raise the tines above the gravel that can become damp from rainwater drainage, minimizing the opportunity for the tines to rust.
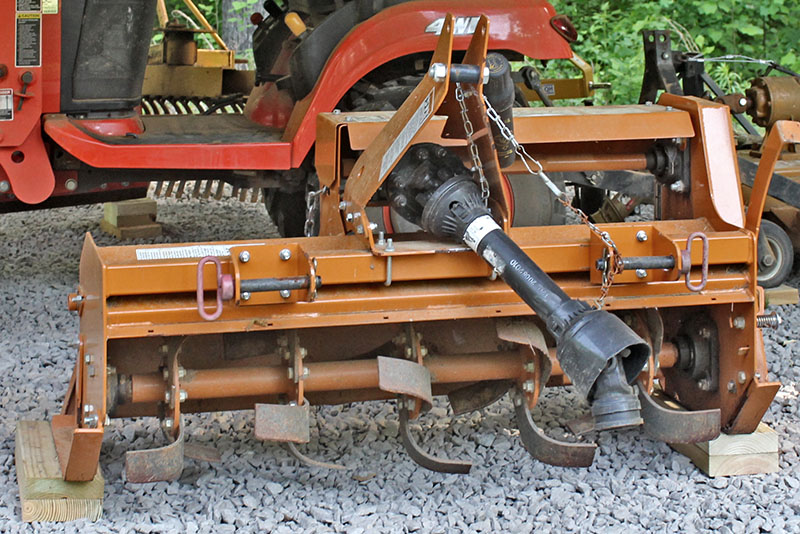
The 44" tiller sits on its landing pads, and needs no additional support. |
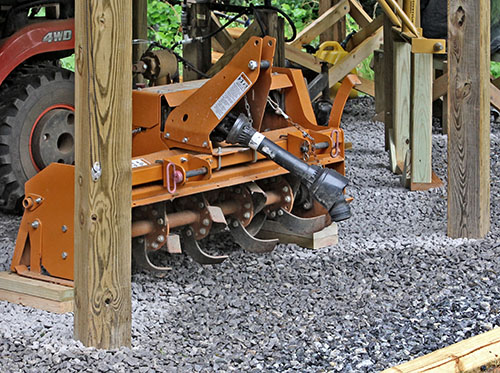
Double-height landing pads hold the tines above gravel that's damp from rainwater draining through it. |
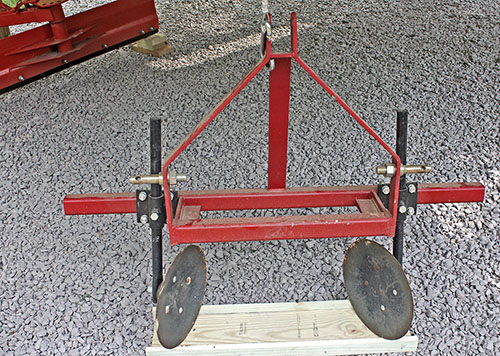
A row hipper has two disks that pull tilled soil into a raised bed that resembles a hip roof; hence the name.
We cut a 32" length of 2x6 for the disks to rest on, and added 1x3 sides to keep the disks from rolling off. We suspended a hook on a cable to hold the hipper upright.
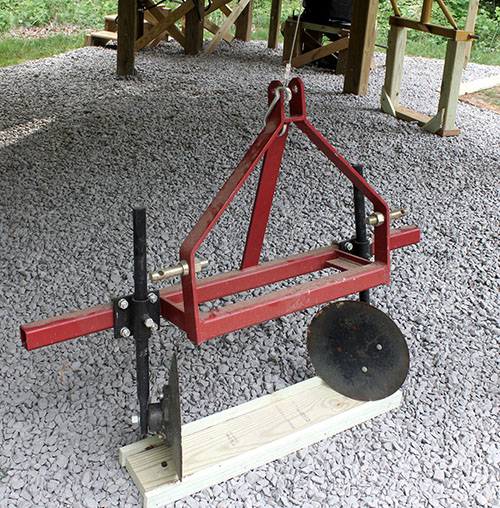
The row hipper is held upright by its cable. |
The hitch's three attatchment points are at the correct height for the 3PH. |
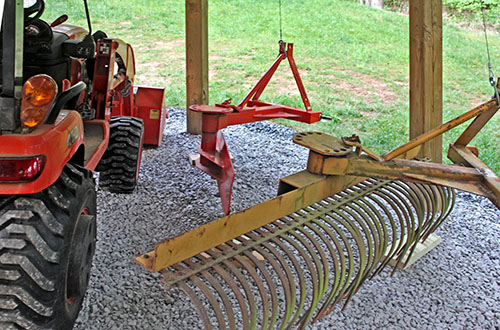
As shown in the floor plan, the 5' rear blade must be rotated 45° to allow space for the tractor and a 6' landscape rake. The angled blade is 3" higher on one end, so one of the landing pads is built-up to support that end.
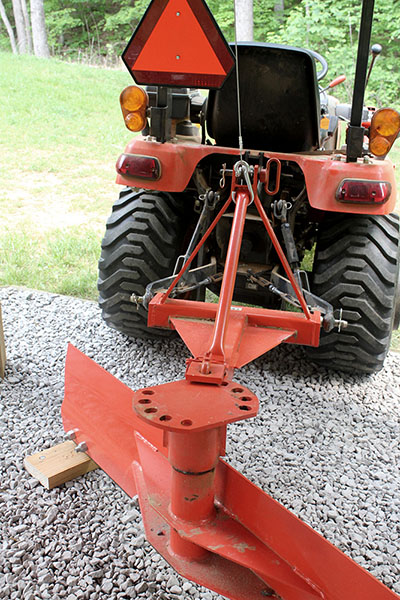
The cable is hooked onto a brace on the rear blade, and the implement is lowered into position, ready for the 3PH to be disconnected. |
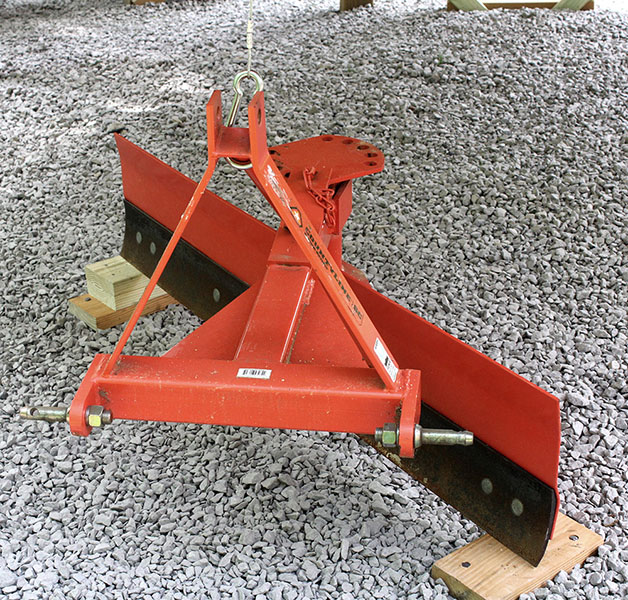
The rear blade stored. The steel cable and hook support the hitch, while the blade rests on two landing pads. Notice the built-up pad for the high end of the blade. |
Like the rear blade, the 6' landscape rake rests on two landing pads, and has a hook on a cable to support the hitch. As the floor plan shows, the rake must be rotated 45° to fit through the bay opening, and to clear the rear blade.
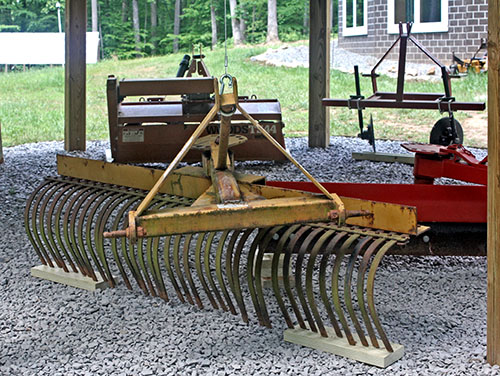
The landscape rake is parked with its hitch suspended on a cable. |
Large as it is, the rake does not interfere with the tractor or the rear blade (background). The reversed tines conserve space. |
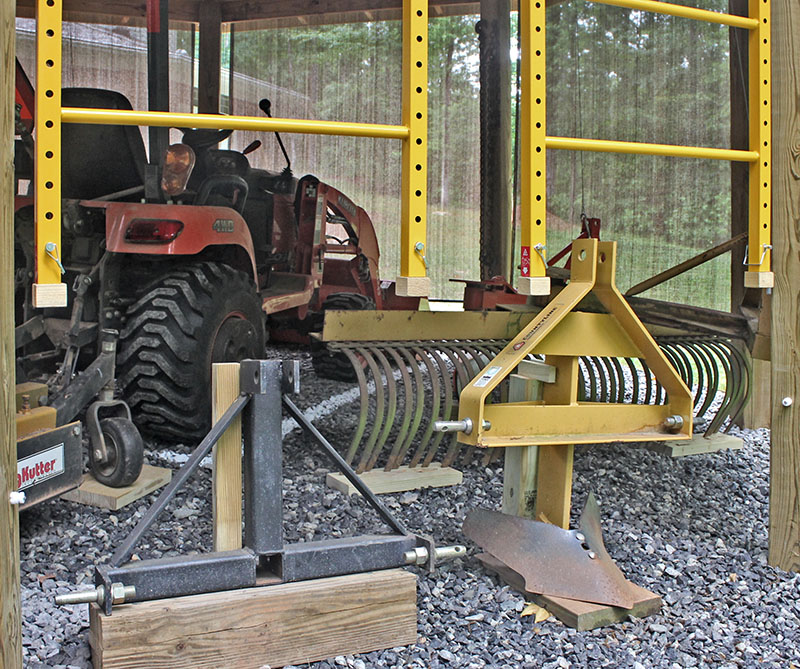
Left. A trailer hitch receiver rests on a length of leftover 6x6, instead of a 2x6 pad. A backstop prevents it from falling backward.
Right. Both sides of a middle buster's blade rest on a 2x10 pad. A 4x4 holds the implement upright, and wooden "ears" capture the spine to prevent tipping.
The yellow legs of the scaffold end pieces hang just above the implements, but don't obstruct them.
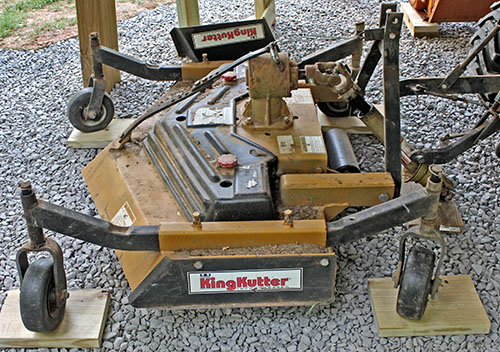
A 4' finishing mower lives in the inaccessible bay behind the tractor. In fact, the rear of the tractor encroaches into this bay, leaving just enough space for the mower. The bay is blocked by a diesel generator, so the mower's hitch faces inward, toward the tractor, and it is picked up and dropped inside the shed. We leave the mower attached to the tractor for the mowing season, and drop it only when a different implement is needed for some other task.
The finishing mower's landing pads are right behind the tractor. |
The mower's position relative to the tractor, rear blade, landscape rake, middle buster, and trailer hitch. |
With no space in the basement to store the scaffold we bought to build this tractor shed, we decided to store it in the shed. We hung the two end pieces on nails above the trailer hitch and middle buster. They do not block access to these implements, even though they hang close.
We hung the two side pieces behind the finishing mower, flanking the opening that is blocked by the generator and horizontal 2x4s. The four blue-painted 2x4s are placed under the finishing mower for safety when it is attached to the tractor and lifted to remove the blades for sharpening.
We found space in the basement to store the scaffold deck.
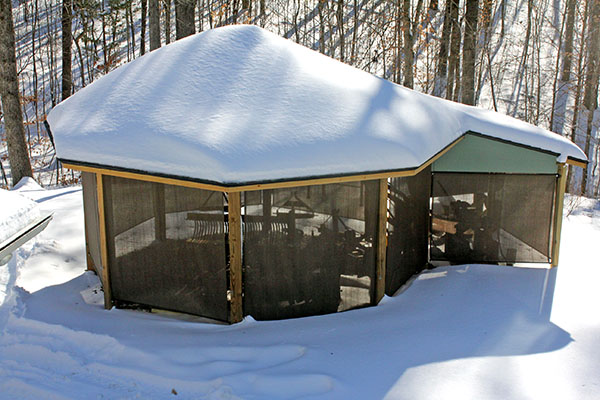
The Blizzard of January 22-23, 2016 dumped 11" of snow at our Central Virginia location (~30" in Washington, DC to the north, and ~40" in some West Virginia locations).
The self-supporting roof held the extra weight just fine. We are pleased that the homemade trusses did such a great job.
Updated May 23, 2023