With the driveway loop leveled, our next project was building a deck. The front door and side door each have a deck with a walkway to the driveway, and there is a large deck in front of the kitchen bay. A "bridge" connects this section to the front-door section.
This project is finally complete! Scroll down to see day-by-day progress, or click the blue button above to see the final update.
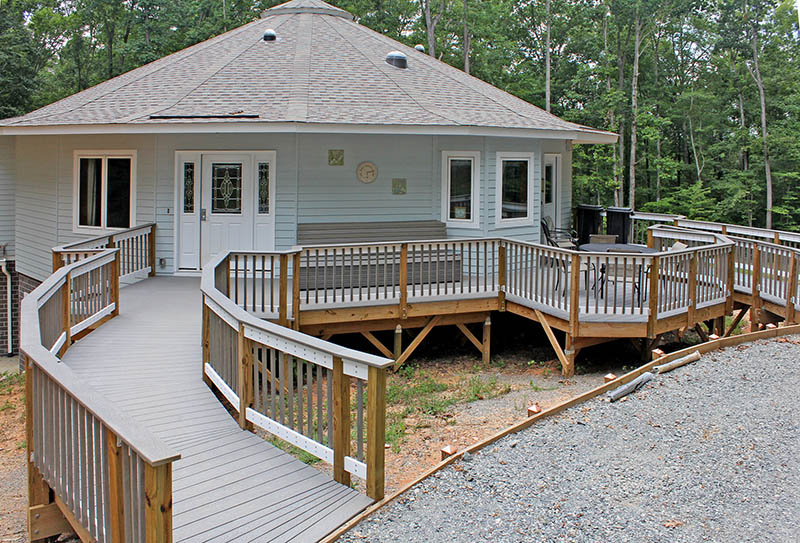
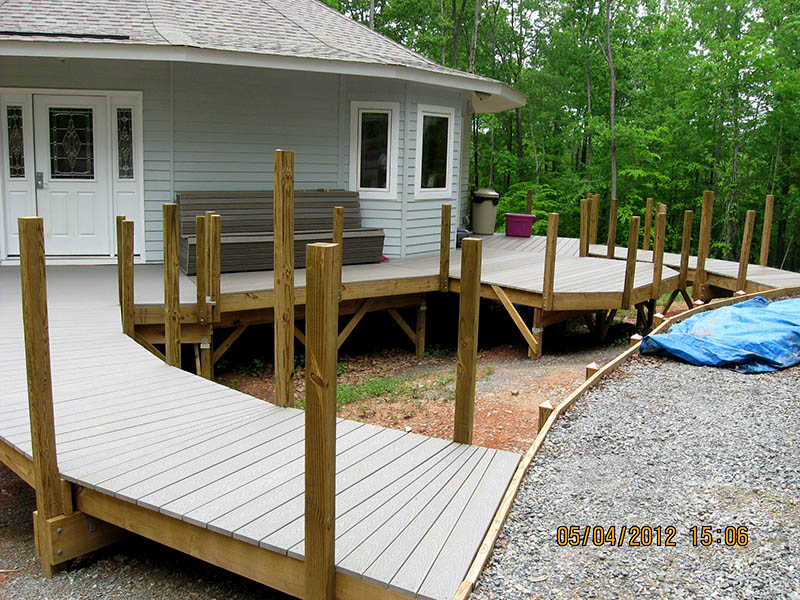
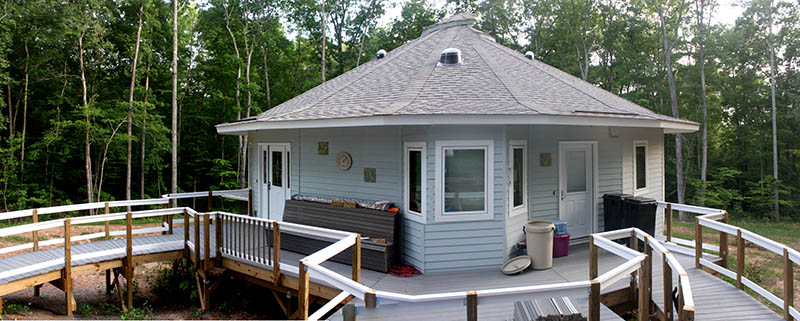
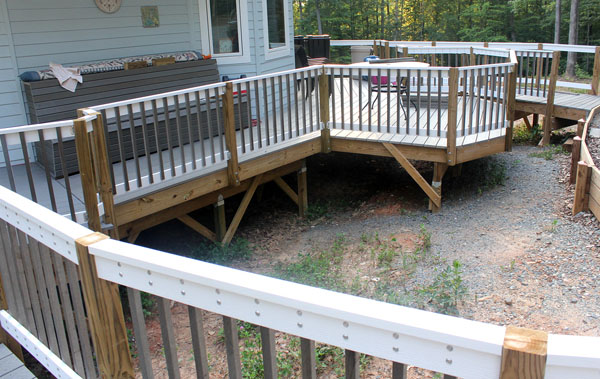
Here is the finished deck. Left-to-right are the front-door deck and walkway, a bridge deck with a bench, a large deck in front of the kitchen bay, and the side-door deck and walkway.
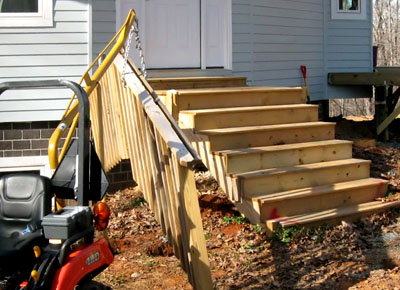
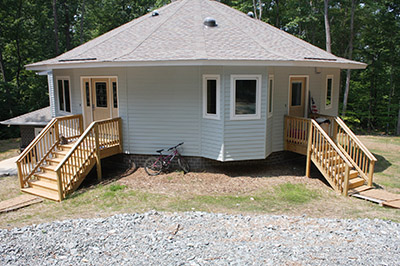
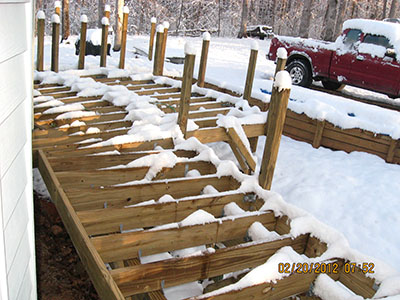
This is what we started with – Tiny landings, steps down to walkways made from plywood and shipping pallets laid on dirt, and a steep slope up to the driveway. It was a challenge on icy January mornings!
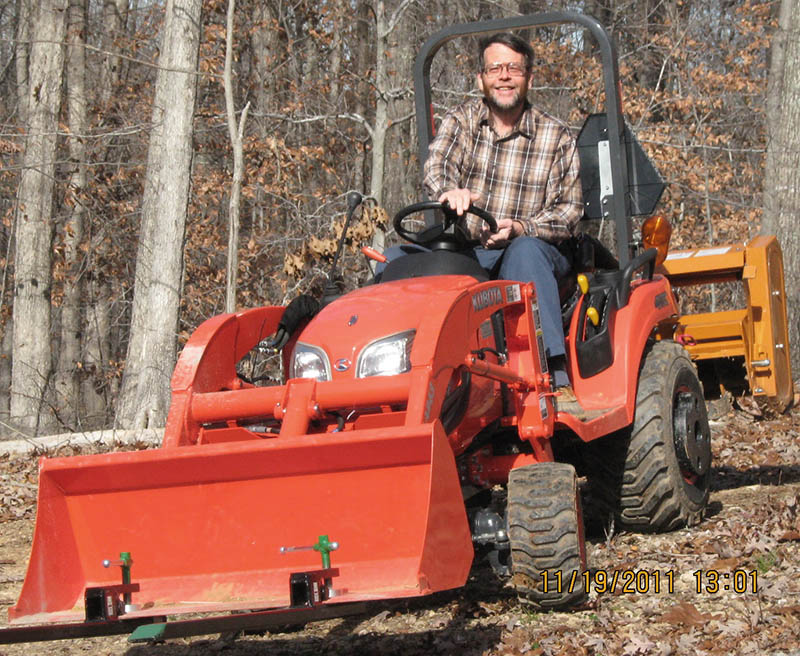
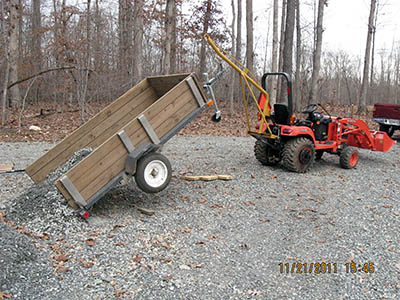
Here is our new toy! We bought a Kubota BX2360 subcompact tractor with a front-end loader (bucket). This machine will help immensely when building our deck, clearing show, leveling the driveway gravel, establishing our yard, and putting in a garden next spring. Along with the tractor, we brought home a 44" tiller, a rear blade, a boom pole for lifting heavy items, a shallow plow called a "middle buster," and set of pallet forks that clamp onto the front loader.
The tractor already has proven very useful on the deck project.
Currently we park the tractor on the patio outside the family room door, but next year we plan to build an octagonal shed (resenbling the house shape) to shelter the tractor and its implements.
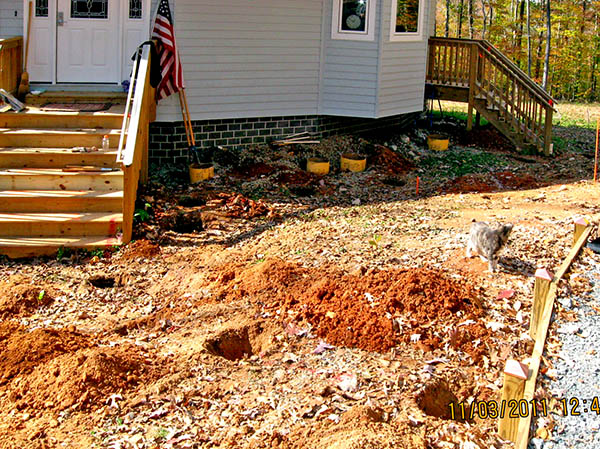
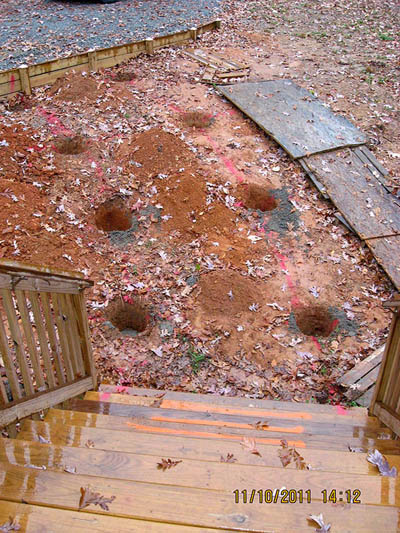
We began by digging 32 footer holes for the deck and walkway support posts. The holes, 13" or 15" in diameter and 18" deep, were started using a two-person 8" power auger, then enlarged with shovels, a root-chopper, and a post hole digger. The holes with yellow Sonotubes near the house were dug in gravel, so the cardboard tubes were needed to hold back the gravel.
This part of the project took about two weeks.
The county building inspector came by and told us that the empty footer holes are up to code.
Today we mixed 24 80# bags of concrete and poured it in 16 post footer holes. Some holes are 15" in diameter, requiring two bags of concrete. The tractor proved its worth, as we slid the bags of concrete out of the trailer and pickup truck into the front bucket, then transported them to locations near the holes, where we slid them one at a time into a wheelbarrow for mixing by hand. The remaining 18 bags of concrete will be delivered in two days.
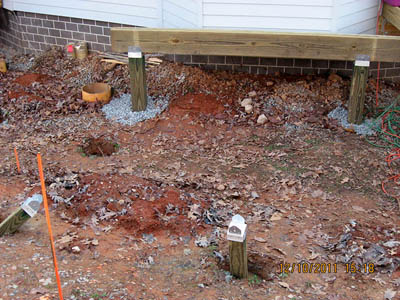
We mixed and poured the remainder of the 1.7 tons (42 bags total) of concrete for the post footers. The eight footers shown here will support the curved walkway from the front door to the driveway. Even though it isn't apparent in this picture, the top of the driveway retaining wall in the background is at almost the same height as the deck in the foreground, so the walkway will be nearly level.
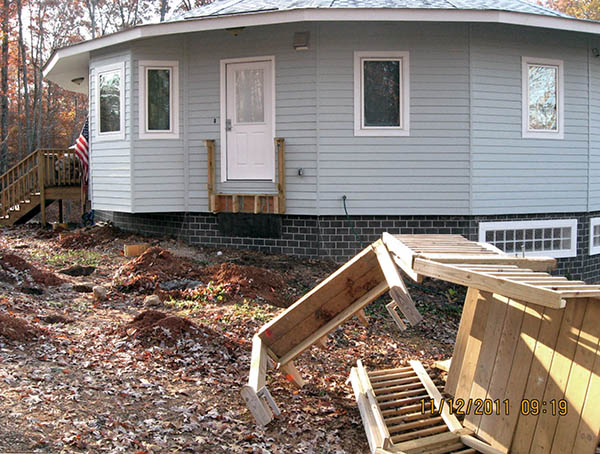
We removed the original temporary deck and steps by the side door, in preparation for building this section of the permanent deck. To do this, we sawed through all the members attaching it to the house or to the ground, then used a chain on the tractor to pull it away and over onto its side.
Yesterday, Mike disassembled the detached deck and steps, then used the tractor to load the pieces into the pickup truck for a trip to the landfill.
Louise removed the remaining deck parts still attached to the house.
Today we prepared the concrete support ledge for a beam, and Mike bolted two 2x10s together and drilled ½" holes for the lag bolts to attach it to the existing 2x12 on the ledge.
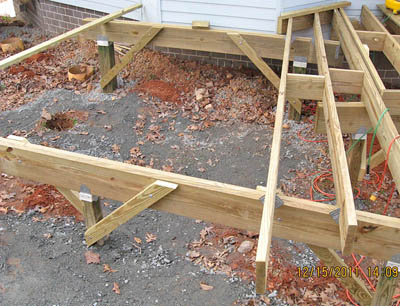
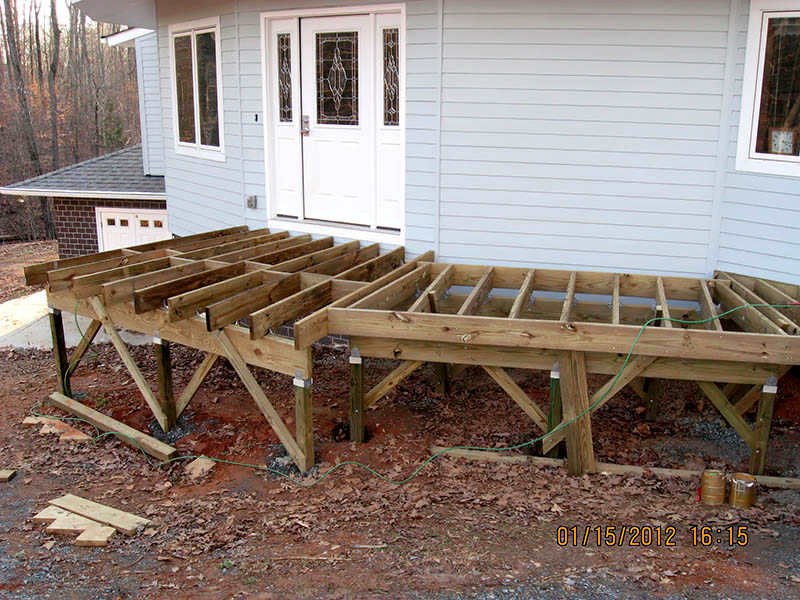
Yesterday we set three 4x4 support posts and installed a double 2x10 beam spanning them, then attached 2x8 joists from the house to the beam. Today we installed blocking between the joists, and cut the joists all the same length from the house wall.
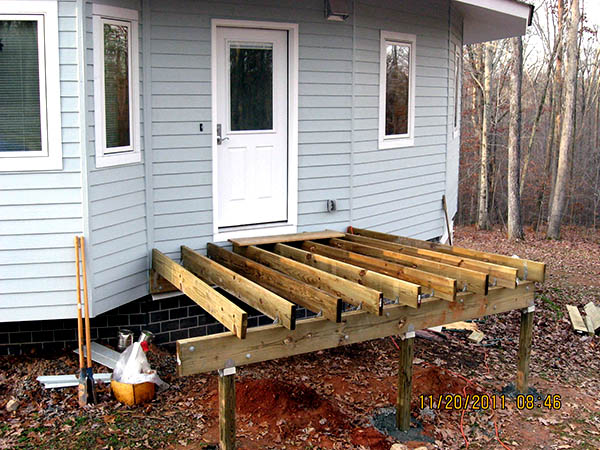
We installed the first pair of posts and beams for the side-door walkway.
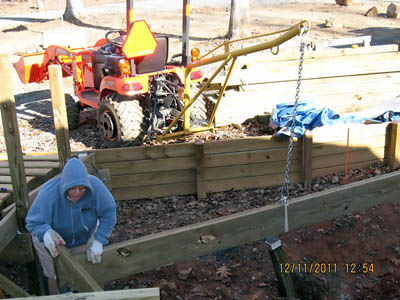
Later, Mike and Miranda went to the local stone supplier and bought 1,000 pounds of #57 stone, then used the boom pole on the tractor to lift the trailer to dump most of it out – much easier than shoveling it by hand.
We installed the second pair of posts and beams for the side-door walkway.
We installed the third and fourth pairs of posts and beams for the side-door walkway. Soon we'll fasten joists to the tops of the beams.
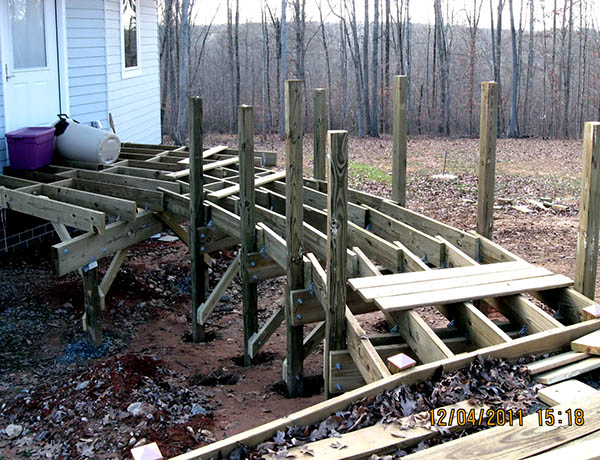
Over the past several days, we installed the joists on the side-door walkway. This part of the framing is complete. Next we'll start on the large deck in front of the kitchen bay, to the left of this photo.
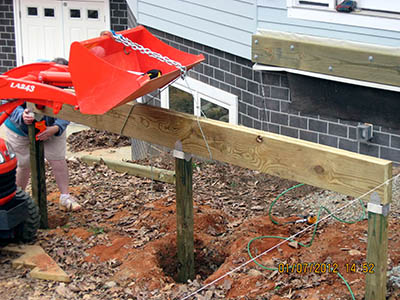
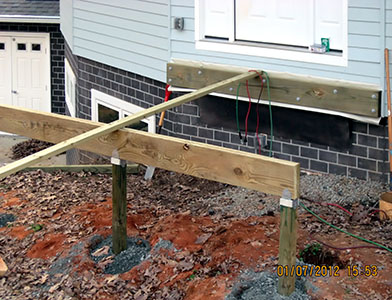
We installed the first beam – three 10' 2x10s – for the kitchen bay deck. This beam rests on two 6x6 posts. The second beam, closer to the driveway, will require only two 2x10s with 4x4 posts because it will span three posts (two of which can be seen in the foreground).
We fabricated and set the second beam – two 12' 2x10s – for the deck in front of the kitchen bay. This was harder than expected thanks to recent rain and subsequent cold weather. When the sun comes up, the frozen ground thaws and turns to slippery mud.
The boom pole on the tractor supported the beam as we struggled to position it, while at the same time plumbing and securing the posts. This would have been nearly impossible without the boom pole.
Yesterday we installed the diagonal bracing on the beams for the kitchen bay deck, and today we cut and installed the first set of joists. We also spread some fine gravel to provide better footing – working was nearly impossible while standing on the slippery mud.
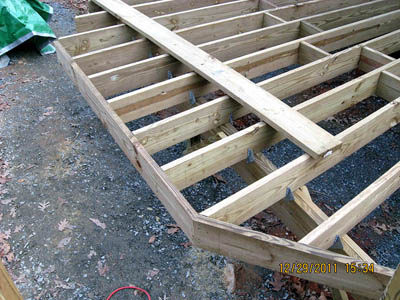
We installed the five 12' 2x8 joists for the center portion of the kitchen bay deck. Next we must add three more joists where the bay angles, then install a band board across the outer ends of the joists.
We installed the remaining three joists for the deck in front of the kitchen bay, and added the final diagonal bracing on two posts. The framing for this section is now complete.
We are debating whether to begin the next phase – the front deck and walkway, plus the bridge deck to this section – or take a break for a few months until the weather warms up. The combination of wet earth and sub-freezing overnight temperatures rising only into the mid 40s during the day makes working uncomfortable and difficult. We'll see. . . .

It took us 11 days to decide, but we will continue, and not take a few months off. After a couple of false-starts and do-overs, we managed to install band boards on the main portion and one of the angled sections of the kitchen bay deck. Only one short band board remains, and then we'll begin work on the deck by the front door.
We installed the final band board on the kitchen bay deck. This proved to be much harder than expected, thanks to a combination of odd angles and warped boards.
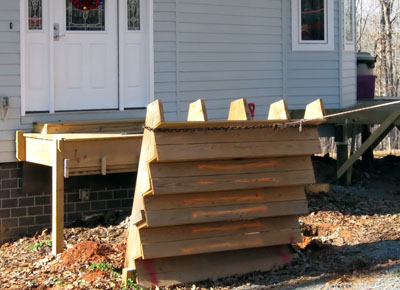
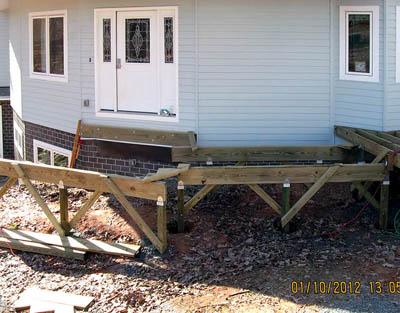
We welcomed the new year by dismantling the temporary deck at the front door. This involved cutting off the railings and steps, then pulling them away with the tractor. Tomorrow we'll finish the job by removing the deck platform and supports.
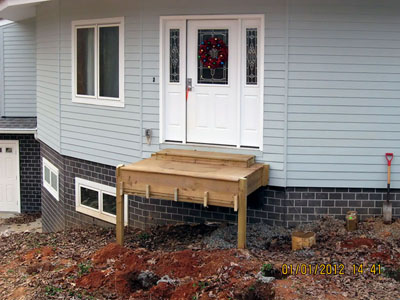
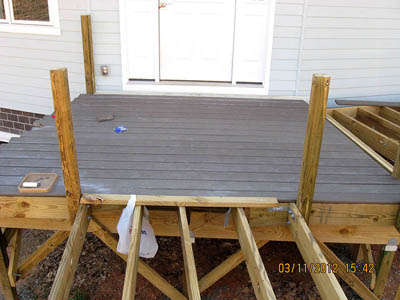
We finished removing the temporary front deck. Mike sawed through the joists and 4x4 posts, then used the tractor to drag the platform to the driveway, where he sawed it into smaller pieces, loaded them into the pickup truck, and drove to the landfill. Meanwhile, Louise removed the remaining lumber stubs and hardware from the 2x12 ledger board attached to the concrete support cast into the foundation wall. The fourth photo shows the result – ready for us to add the new deck's framing.
|
|
|
|
|
|
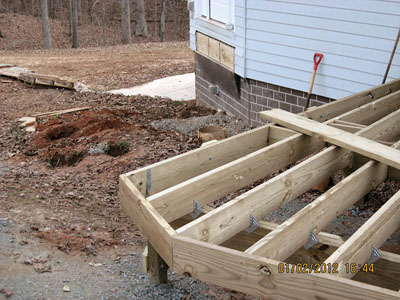
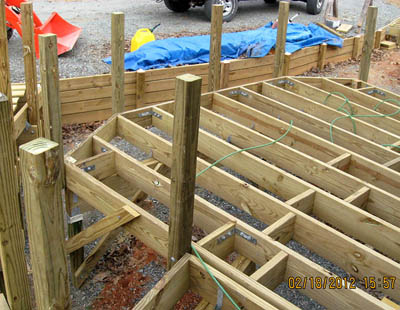
Warm and dry weather over the past several days helped us make excellent progress framing the front deck. We installed flashing under the door, then fabricated a ledger board from two 2x10s, and bolted that to the 2x12 already attached to the house and concrete ledge.
Next we screwed together two 2x10s to make a beam, and used the tractor's front-end loader to lift and hold it exactly in position over three 4x4 support posts. Tomorrow we plan to install the joists between this beam and the ledger board.
|
|
We installed bracing on the beam for the front deck, then we fabricated and installed two double 2x10 beams for the narrow bridge deck that connects the front deck with the kitchen bay deck.
Yesterday and today we cut and installed braces for the two bridge deck beams. Next step: Add joists to this and the front-door section, after which deck framing will be complete, with only the front walkway to the driveway left to frame.
Then, after an inspection, we can install the decking and railings. (The county building inspector asked us to call for a framing inspection before installing the decking – normally not required – because the structure is too low for him to crawl under.)
We spent the previous two days installing joists for the bridge deck in sub-freezing temperatures and blowing wind, and today we finished this section by adding front and rear band boards.

Today we spent nearly four hours in 38°F installing joists and blocking for the front deck. Now that this section is complete, we'll begin building the walkway to the driveway.
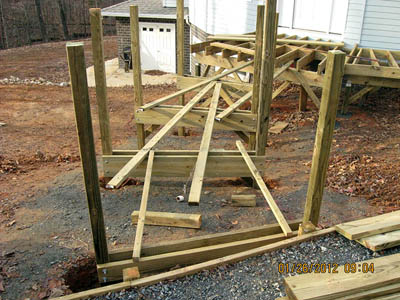
We installed the first pair of posts and beams for the front walkway, along with their bracing. This work is difficult because the entire operation must be done with the posts standing upright, in order to accurately measure for a level walkway. Two people are needed to clamp the beams in place while simultaneously holding the posts plumb. Then one person steadies the posts and beams while the other drills ½" holes and installs bolts.
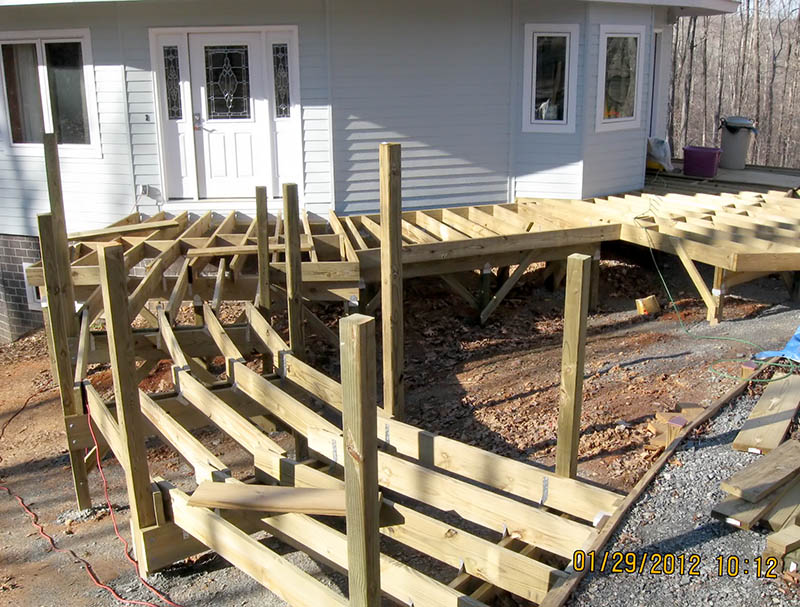
After five days of cold and rain, we got some nice weather, and built two more pairs of posts and beams for the front walkway. Only one more pair to go!
We installed braces on the third pair of posts and beams, then built the fourth pair. Next, we tweaked their positions on the footers so each set is equidistant from the arc's center point, so each pair is "aimed" at the center point, and so the spacing between posts is approximately equal. This is an iterative process that requires un-nailing the stabliizing 2x4s, which makes the assemblies prone to falling over.
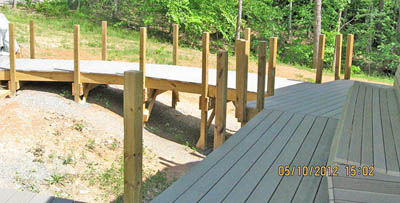
The walkway framing looks like this. Tomorrow we'll install the joists.
Taking advantage of another day of pleasant weather, we installed the joists on the front walkway. We still need to add two short band boards to the front deck, and then faming will be done.
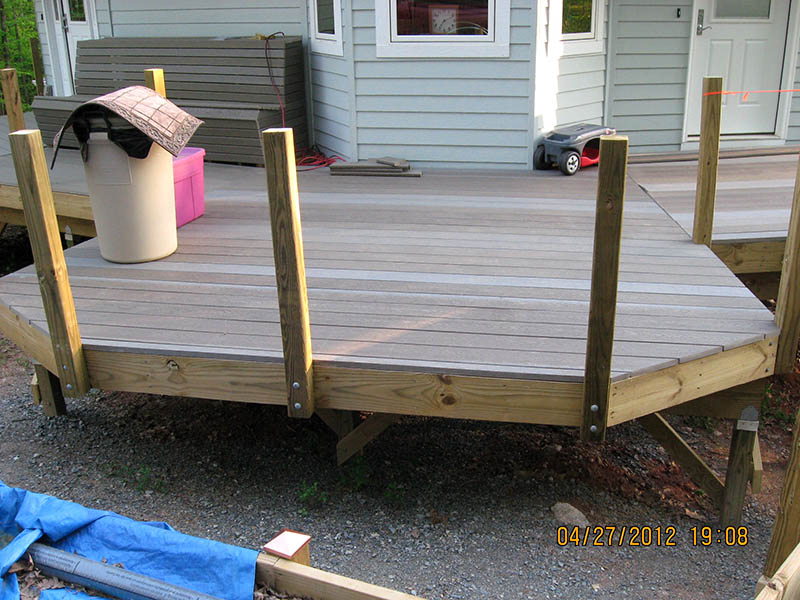
Framing is complete!
We added band boards to the front deck on either side of where the walkway joins, and we're ready to call for a framing inspection on Monday. Then on to decking and railings. This is what we have built.
The building inpector liked our framing work, so we can proceed with the decking and railings.
After a brief hiatus, we began installing 4x4 posts for the railings. Yesterday we did five, and today another four. Each post needs metal brackets behind it, and sometimes wooden blocking, to provide strength and stability. In addition, we must cut shims on the bandsaw and use them to plumb some posts. Consequently, work goes slowly, but we're making good progress, with nine of 23 posts installed.
We installed two more railing posts on the bridge deck between the front door and the bay section. It's slow-going due to odd angles and tight spaces in the framing behind some posts. Here we see eight posts on the front deck, plus three on the bridge to the kitchen bay deck.

We installed only one post today, due to time constraints and a lot of special fitting work.
It rained yesterday, but today we installed three more railing posts. Only eight more to go!
Three more posts installed – five left! Here we see two posts where the side-door deck joins the kitchen bay deck, and five more along the front of the kitchen bay deck.
We installed three of the remaining five posts this morning before deciding that three hours is long enough to work when the temperature is 37°F.
And then it snowed.
After three days waiting for the snow to melt, we installed the remaining two posts on the side-door deck. All posts are up, so next we will begin installing the Trex decking.
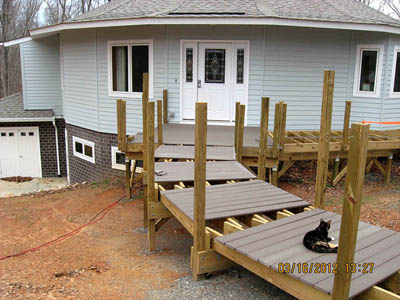
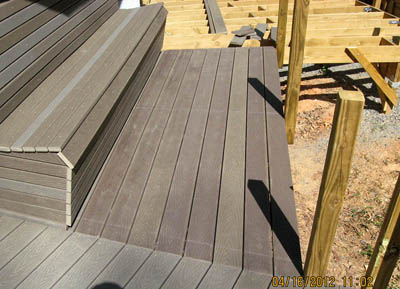
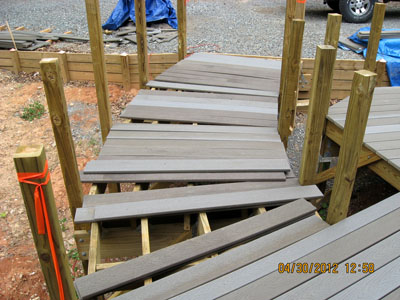
When the snow melted and things dried out, we went to work laying the decking. Ha! Our plans to cut notches for the railing posts proved unrealistic, due mainly to the odd angles found everywhere. After many hours and several do-overs, we decided to cut notches only for posts on the ends of the planks, and lay them inboard of the other posts. Maybe we'll add a narrow trim board along the decking edge between these posts.
The first plank was a bear. Hopefully the rest will be easier.
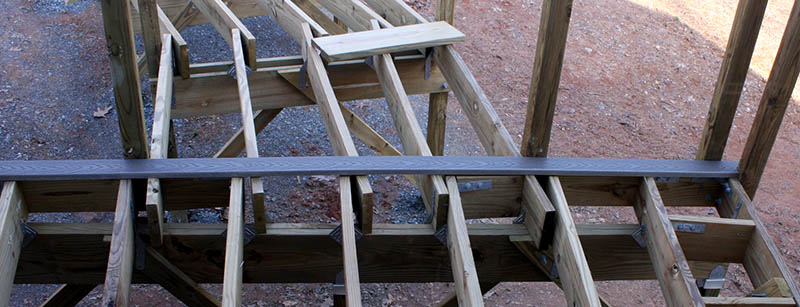
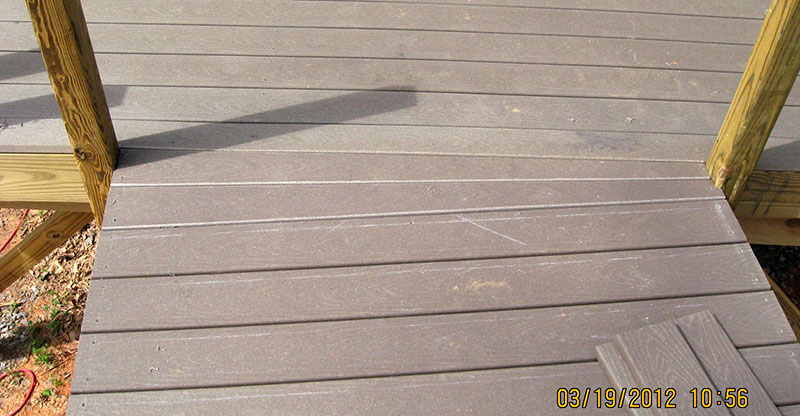
After time lost to another 4" of snow and waiting for it to melt, plus a couple of false starts, we managed to install eight Trex planks on the main deck.
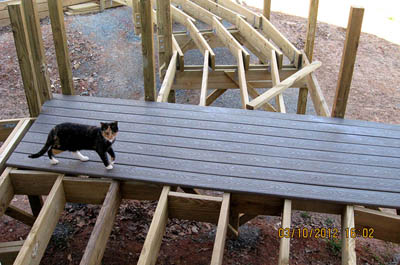
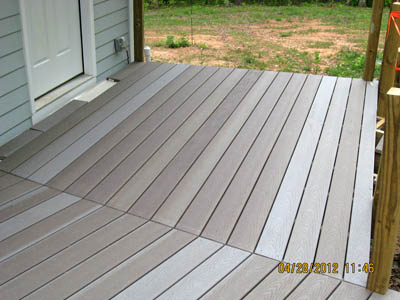
We made good progess decking the main section today. Only one plank remains to be ripped to width and installed, and then we can move on to the walkway.
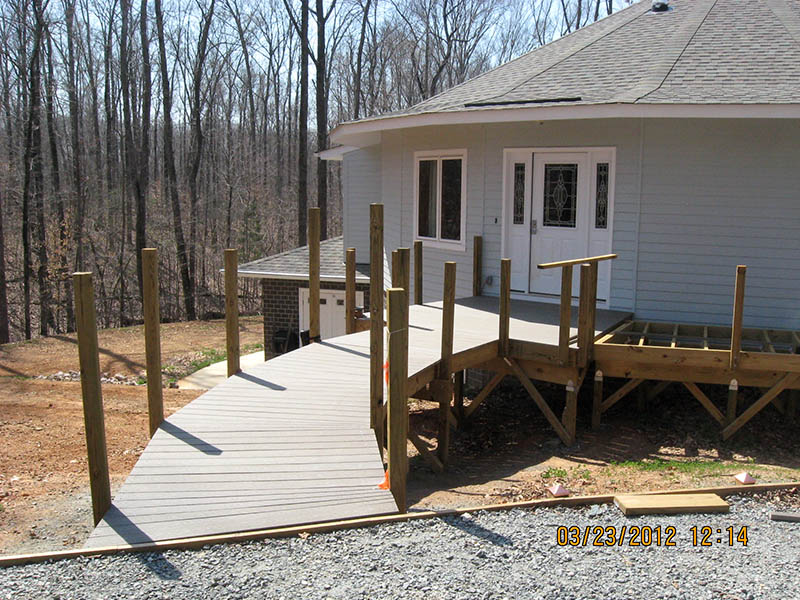
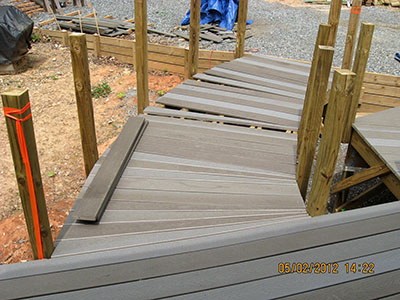
We spent yesterday and today cutting and attaching Trex planks to the front walkway. Only the two sections nearest the deck are permanently screwed down; we'll align and fasten the remaining two sections next time.
We cut and installed the first-ever tapered planks for a "wedge" section where the front walkway bends to change direction (gaps in the photo above). This involves making two long taper cuts on each plank, then carefully fitting them between railing posts. Also, the cut edges must be rounded-over with a router to match the factory-rounded edges of the other planks.
Over the past several days, we tapered and installed planks on the three remaining wedge sections of the front walkway. This walkway and the front deck are complete except for railings. Next we'll design and build a seat for the bridge deck, then begin planking that section, the kitchen bay section, and finally the side-door section.
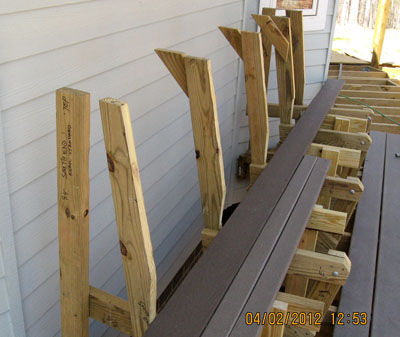
Today we fabricated five frames for a bench on the bridge deck. Bracing and other minor pieces still need to be cut and installed, then we will bolt the frames to the bridge deck joists, and begin planking that section of the deck.
We added bracing and other members to the five bridge-deck bench frames. The frames are ready to install.
We installed the five bench frames on the bridge deck. This was not an easy task due to limited space for drills between closely-spaced joists, but we got the job done.
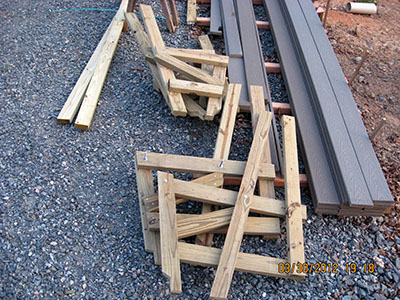
Today we used the table saw to rip 11 12-foot 5½" Trex decking boards into 22 2¾" planks for the bench. Then Mike used a router to round-over the cut edges to match the factory-rounded edges. The narrower planks will make the bench more attractive.
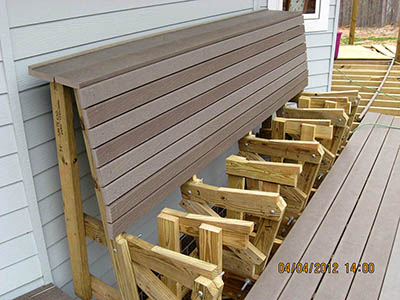
We performed final shaping, tapering, and shimming of the bench backrest frames, and installed supports for a shelf behind the backrest.
We made good progress yesterday and today on the bridge deck bench. We attached a shelf to the top of the backrest, then installed 2¾" planks on the backrest itself. In addition, we successfully cut off the ends of the backrest planks evenly at an angle to match the shelf ends. Finally, Mike cut and installed tapered shims on the tops of the seat supports to provide a more comfortable angle. Tomorrow we should be able to plank the seat and the bench front beneath the seat.
We spent considerable time figuring out how to attach the bench seat planks so they will end at the front edge and curve comfortably over into the front planking below. Once that was decided, we screwed the seat planks to the frames, then ripped a special plank for the front edge. We should be able to install that and the front planking tomorrow.
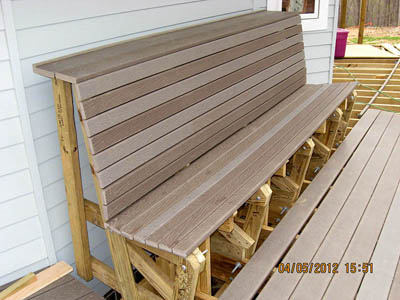
Today we finished planking most of the bench on the bridge deck. All that remains is to cover the ends with short planks, and then we can deck the bridge section.
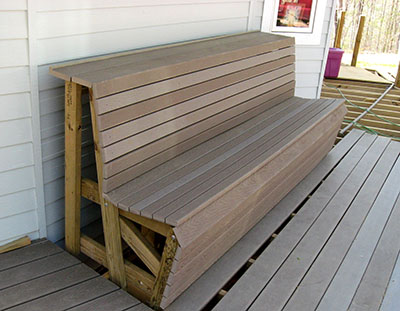
After a four-day break, we reduced the height of the bench seat back. Not only does the bench look better relative to the deck and the house, the back now is low enough to comfortably rest an arm on the shelf while seated. Much improved! Compare the height with the window in this photo and in the photo above.
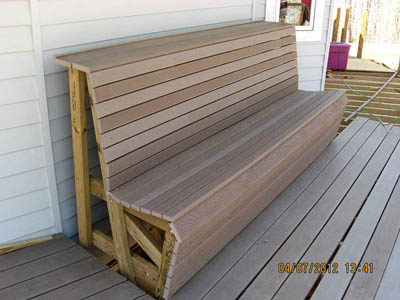
We installed planking on the south end of the bridge deck bench. Once we trim the back ends of these planks and finish the north end just like this, we'll be ready to plank the bridge deck itself.
Yesterday and today we installed the planks on the north end of the bridge deck bench (left photo), and today we trimmed the back ends of the south end planks (right photo).
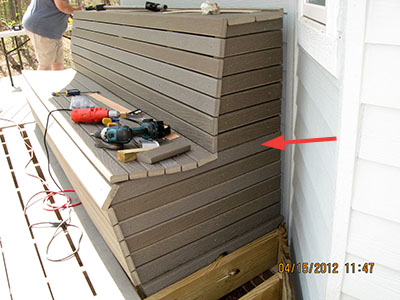
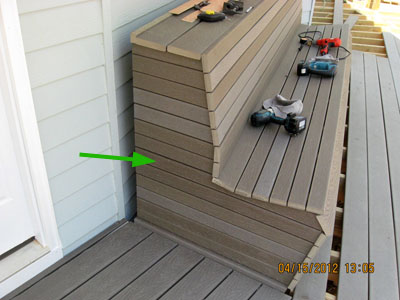
Yesterday it took us three hours to shape and fit one board on the north end that runs directly beneath the seat (red arrow)! Two days ago, the same board on the south end (green arrow) took less than hour. Sometimes Lady Luck smiles on us, but yesterday she frowned.
|
|
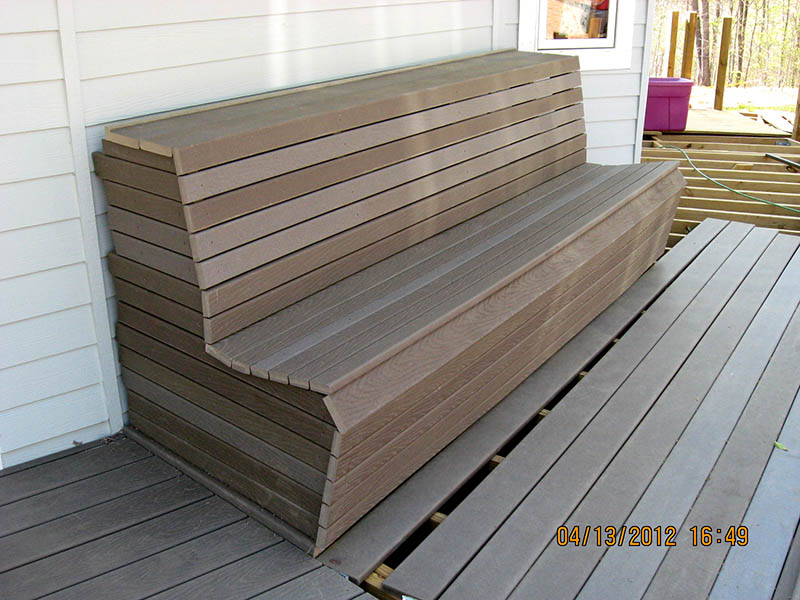
The bench is finished!
On to planking the bridge deck. Later: We cut one end of all bridge deck planks to the correct angle. Tomorrow morning we'll screw them down.
We screwed-down the planking on the bridge deck, and trimmed the north ends flush. The next step is to begin planking the kitchen bay deck (background).
In two days, we laid the first nine planks on the kitchen portion of the deck, and readied 11 more for installation and trimming. Today we cut the ends of two planks to fit around railing posts, and fastened them down.
We also planked one of two small triangles where the deck follows the 38° side walls of the kitchen bay. It turned out well. We're making good progress, and hope to have all decking completed in a week or two.
Yesterday we fastened all but four planks to the kitchen bay deck and trimmed them to length. Today Louise cut the angled ends on the remaining four, and we screwed them down. Only one plank remains – a narrow one that we'll have to rip to the needed width.
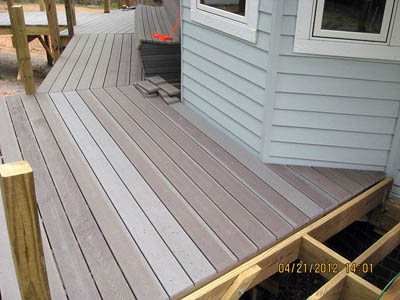
The kitchen bay deck is planked!
We ripped the final plank to width for the kitchen bay deck, and installed it. Here is a photo of our handiwork.
Next we began planking the side-door deck (upper-right above), installing two planks and cutting the correct angle on one end of the 15 others needed for this section.
This morning we screwed-down 15 more planks on the side-door deck, and trimmed the north ends flush. Only two more planks remain – one that must be notched for a post and a narrow one next to the house. When this deck is complete, we will begin planking its walkway to the driveway.
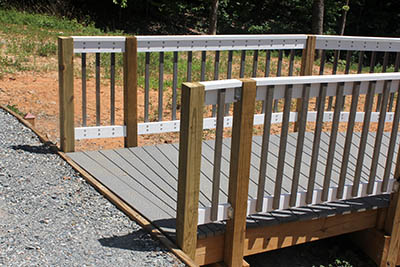
The side-door deck is planked!
Yesterday we cut and installed the two remaining planks on the side-door deck.
Today we started on the side-door walkway, cutting 34 planks to length, then laying them down to get an idea of the spacing, and how many must be tapered for the wedge sections where the walkway changes direction.
We spent over four hours measuring and shaping the first four planks for the side-door walkway. These go where the walkway bends to meet the deck, so each plank must be tapered and accurately cut to length. It's a slow and tedious process, requiring multiple trips to the basement workshop to use a taper jig on the table saw, but we prevailed. The remaining three wedge sections should be easier.
We tapered three more planks for a wedge section on the side-door walkway, then screwed-down seven planks for the first two wedge sections. We also screwed-down five planks for the second straight section. Two wedges and two straight sections remain, plus a couple of custom-tapered planks at the driveway end.
Later: We came back in the evening when it was cooler and screwed-down 10 planks for the remaining two straight sections.
The deck is decked!
Yesterday and today we cut and attached the final planks on the side-door walkway and the small triangle on the south side of the kitchen bay, next to the bench. The entire deck is planked (except for some omitted screws). The next task is to fabricate and install the railings. Following that, the final task will be to put in the missing deck screws – only enough screws were installed to hold each plank in place, so adding the rest will truly complete the decking, and make it more solid.
Here is the entire deck: front-door walkway and deck in the foreground, bridge section with bench, kitchen bay section, side deck and walkway in the distance.
After a six-day hiatus to accommodate visitors and rainy weather, we resumed working on the deck by cutting all of the railing posts to the same height. Mike built a jig which made this job much easier than we initially anticipated.

We spent five days making pickets (balusters) for the railings. This involved cutting Trex planks into 27" lengths, then ripping each length into four pieces 1-3/16" wide. Next, Mike used a router on each picket to round-over the two edges that will face the deck. Finally, Mike used the tractor to carry the 280+ pickets, weighing 350 pounds, from the basement workshop to the deck.

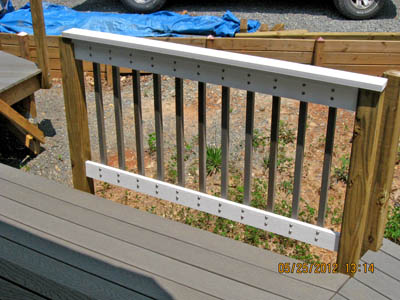
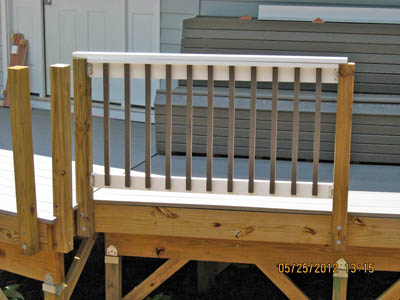
After several days of working in the shop to prepare PVC boards for railings, and some head-scratching on the deck, we devised a plan to mount the railings, and got the top rail of the first section installed.
Working four hours in the hot sun, we learned how to evenly-space and attach pickets to the top and bottom rails of a railing section. Mike used his computer to make paper rulers that show the unique picket spacing for each section, and these help a lot, but we must tweak the spacing to accommodate minor variations in post position and alignment.
These photos show both sides of the first section. At the moment, the top "cap" board is just sitting there for show. When the railing is complete, long cap boards will span multiple sections.
|
|
In two days we installed 10 more partial sections of railing. First we install the top rail, then later we install the bottom rail. Later still, we use the two together to establish picket spacing for the section, then we remove both rails and lay them flat on a table to attach those pickets.
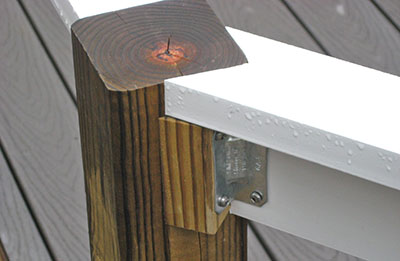
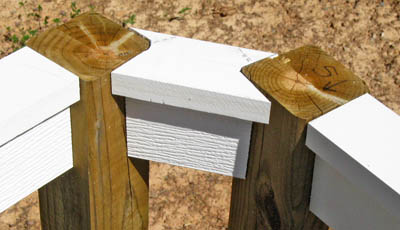
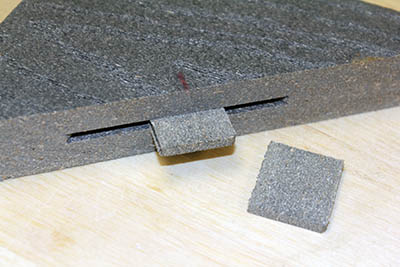
Yesterday we devised a way to mount railing sections between posts that are sharply rotated relative to each other. This involves using the bandsaw in the shop to cut a notch in each end of the rail, then either bending the steel mounting bracket to fit the post or cutting a wooden shim to hold an unbent bracket at the correct angle. This photo below shows an end notch, a shim, and a bracket.
We installed five more top rail sections, and cut a sixth to length, ready for installation early tomorrow morning.
We installed four more top rail sections before stopping to fix the trailer light wiring on our Toyota Highlander. This photo shows the one complete and 21 partial railing sections after today's work (and 1¼" of rain in the evening).
We installed nine more top rail sections today. Only six sections remain – two full-size on the side-door deck and walkway, plus four tiny sections between closely-spaced posts on some deck corners. Then we can begin fabricating the lower rails and attaching pickets to each section.
Over the past few days, we finished installing the top rail sections, including very small sections that needed their ends cut to fit between corners of two closely-spaced posts, as shown here.
Today we set up jigs and developed procedures for installing the lower rail sections.
We installed five lower rail sections along the front-door walkway, and attached brackets for three sections on the deck itself (the remaining walkway sections require bracket shims, with each pair requiring a trip to the workshop – extra work we decided to postpone).
Mike cut a handful of shims in various shallow angles, while Louise attached metal brackets to posts for lower rails not needing shims. When the shims were complete, Louise installed the remaining brackets with them. Now we're ready to finish cutting and installing the lower rails, but rain is forecast for tomorrow, so we'll probably go see the movie Men In Black 3 instead.
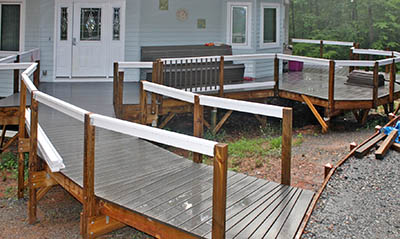
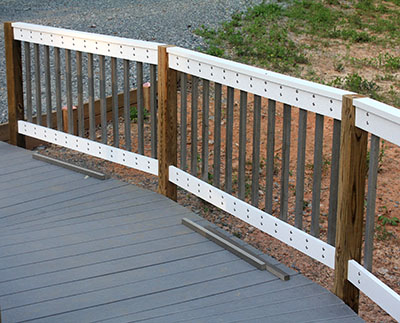
Favored with a cool breeze and low humidity this morning, we cut and installed 11 more lower rails. Here is a panoramic view of the entire deck and walkways, showing most of the lower rails.
We finished installing the lower rails. Romorrow we'll start on the pickets.
After several hours working at his computer, Mike printed paper "rulers" for installing pickets. Each ruler must be scaled accurately according to the distance between posts, so the correct number of pickets are evenly-spaced along the railing section.
The rulers proved to be accurate, and we installed 12 pickets on one section of the front-door walkway.
We installed 12 pickets on a second walkway railing section, and "prepared" three more sections. This preparation involves carefully measuring the location of the two end pickets, then securely attaching them. This way, the rails hold their relative positions when we move the section onto a table to install the remaining pickets. One end of such a "prepared" section can be seen on the right side of this photo.
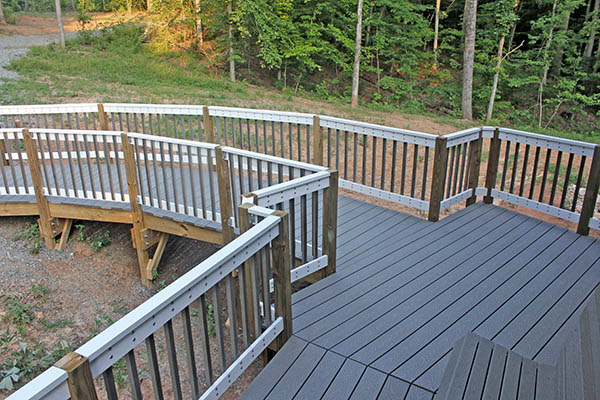
We got rained-out yesterday, but today we installed pickets on 10 more railing sections. Mike and Louise worked together until early afternoon, when Mike had to run some errands, so Louise worked solo installing pickets on those 10 sections sections. Here are the front deck and walkway after today's effort.
We got an early start, and prepared nine more railing sections with two end pickets apiece before heat, humidity, and full sun drove us indoors. In the afternoon, Louise went back out in 95°F shade and installed pickets on those sections. Only 10 sections remain, so we should be done with the pickets in a couple of days.
Another hot day. We prepared the final seven railing sections early in the morning, and then Louise went out after noon in 97°F shade to install all the pickets on those sections.
We must re-make one short section because the pickets ended-up in the wrong positions, and after that we can begin working on the cap rail for the railing.
We re-made the one short railing section with the incorrectly-spaced pickets, so now all of the pickets are up!
We finally decided how to end the railings where the walkways join the driveway. We installed two 4x4 posts at the end of each walkway to support short railing extensions, so people have something handy to grab at that transition.
We installed pickets on the four short railing sections at the ends of the walkways. All pickets are now installed.
Following the installation of the final picket, we tackled the cap board for the railing. This is made of the same Trex we used for decking, and is screwed to the wooden railing posts and PVC top rails. We spent considerable time devising a way to cut the angled ends accurately, and then connect them securely and smoothly. Our final method is to cut the angle on the table saw in the workshop, and use a biscuit joiner to cut a slot in each end. We sliced 50 thin 1" square wafers from a leftover Trex picket to use as biscuits, since regular wood biscuits would rot over time.
The left photo shows the homemade biscuits, and the right photo shows the first two sections of cap rail temporarily screwed in place (they must be removed to cut the remaining angled ends).
|
|
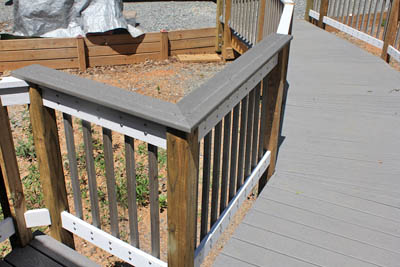
Over the past three days we installed cap boards on nine more sections and two "partial" sections, where the boards have one end cut to the needed angle, but the other end awaiting final fitting.

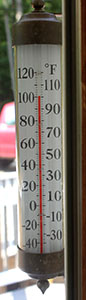
This is why we get up early to work on the deck, and knock off about 11:00am.
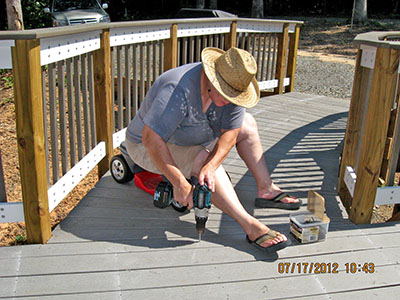
The hard drive on our Linux server died on July 1, and it was July 20 before Mike was able to buy a new (used) one, install and configure Linux, and restore the data from a backup. Consequently, we had no way to update this website with photos of our daily progress.
Suffice it to say that we did work on the deck nearly every day until July 17.
We finished building the deck! Yesterday Louise drove the "golden screw" into the Trex decking, marking the final step in the project. Today the building inspector stopped by and gave us a passing grade.
|

|
Here is a shot of the complete deck, looking from the end of the side door walkway, across the kitchen bay deck and bridge, to the main deck and walkway in the background.

Updated May 23, 2023