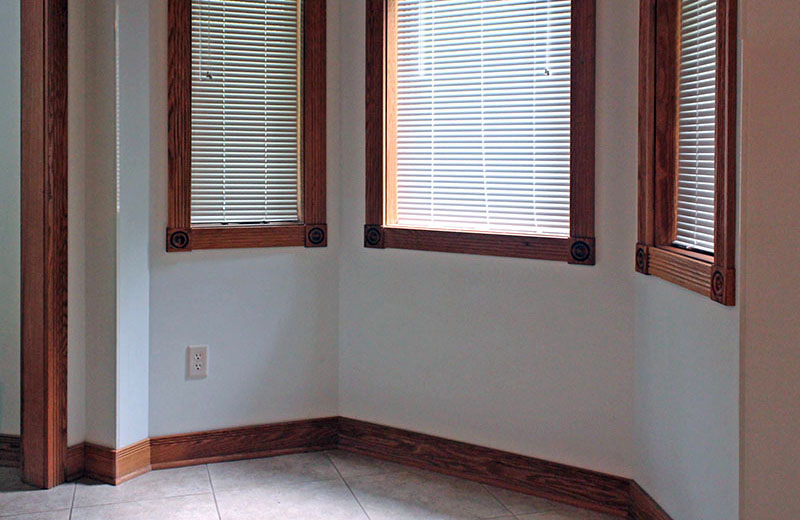
Our kitchen has a bay where a normal table and chairs don't fit well. We decided it needs a custom table and a permanent bench along the bay walls. Here it is.
These are the basic plans. The trapezoid bench will be attached to 2x6s bolted to the bay walls. The bench backrest also will be attached to the wall. A shelf under the bench will hold seat cushions when not in use. The straight edge of table will extend over a portion of the bench.
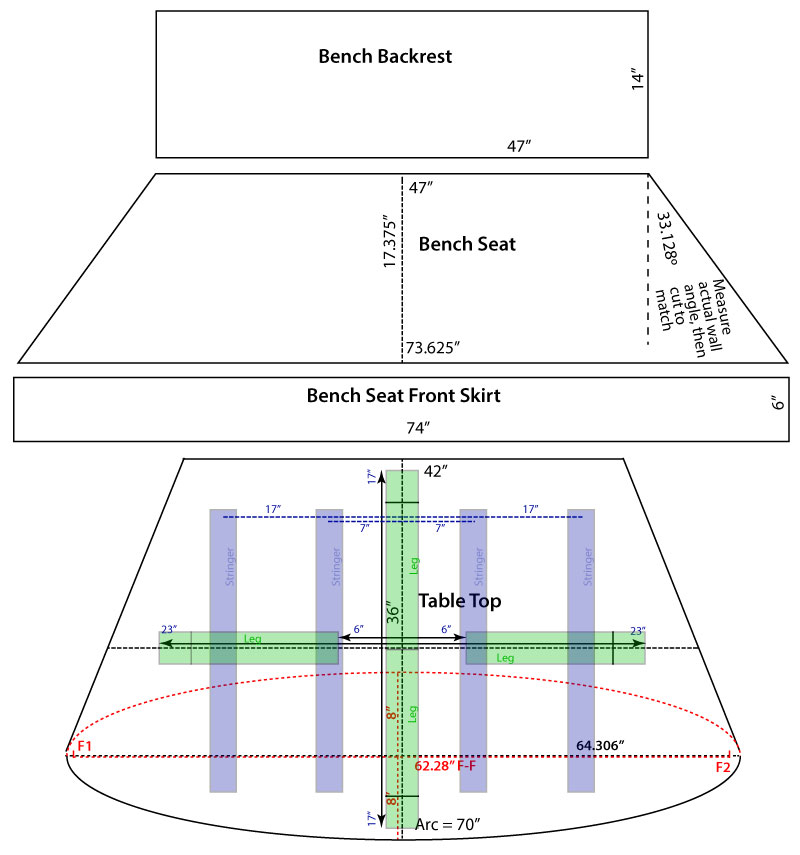
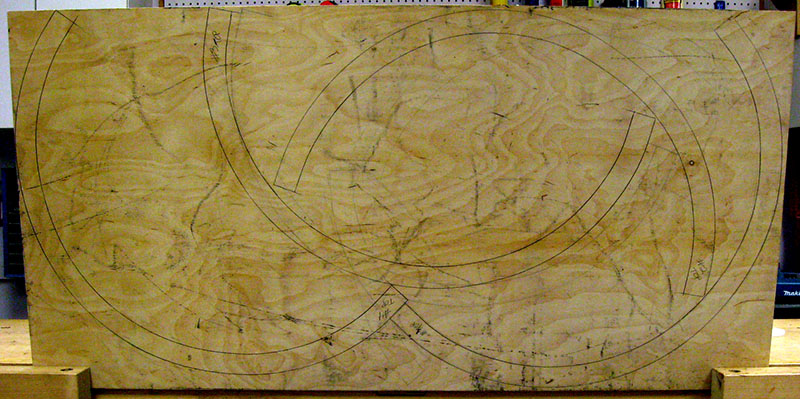
The table top is a trapezoid with one edge half an ellipse. The red lines on the plan show the full ellipse and its focus points. We'll need these to draw the ellipse on the wood so we can saw the curve.
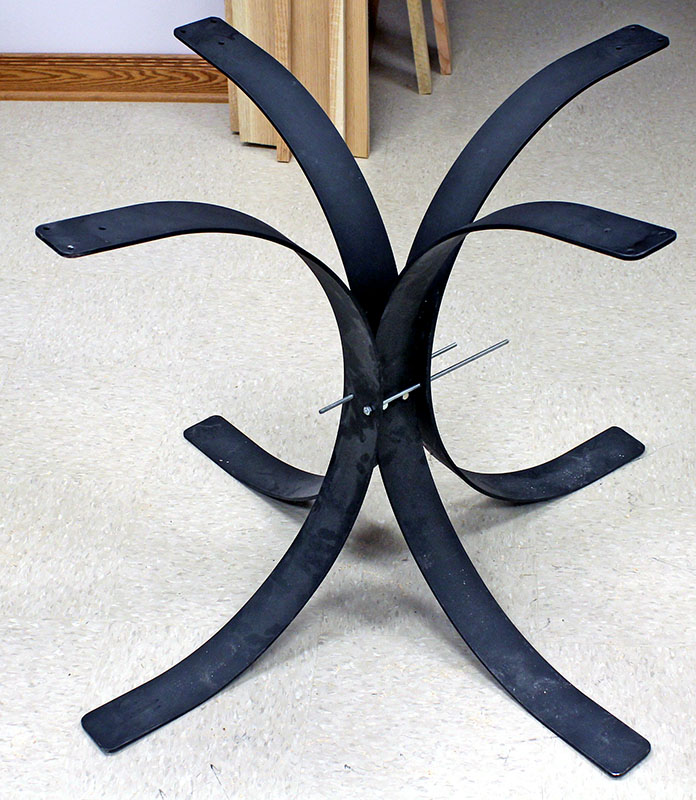
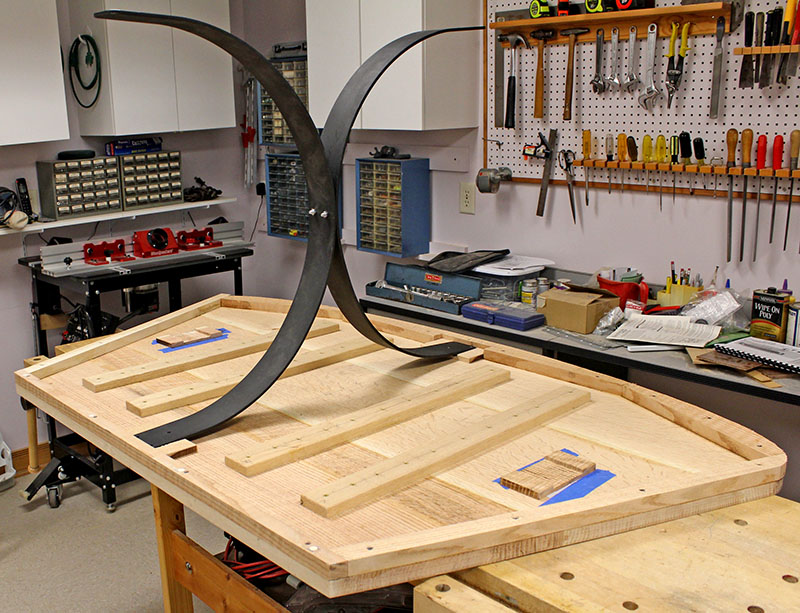
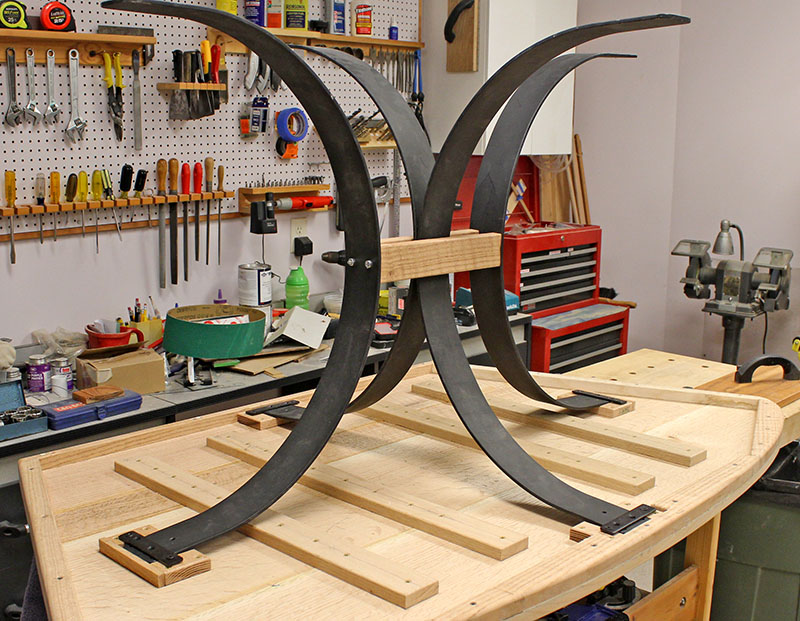
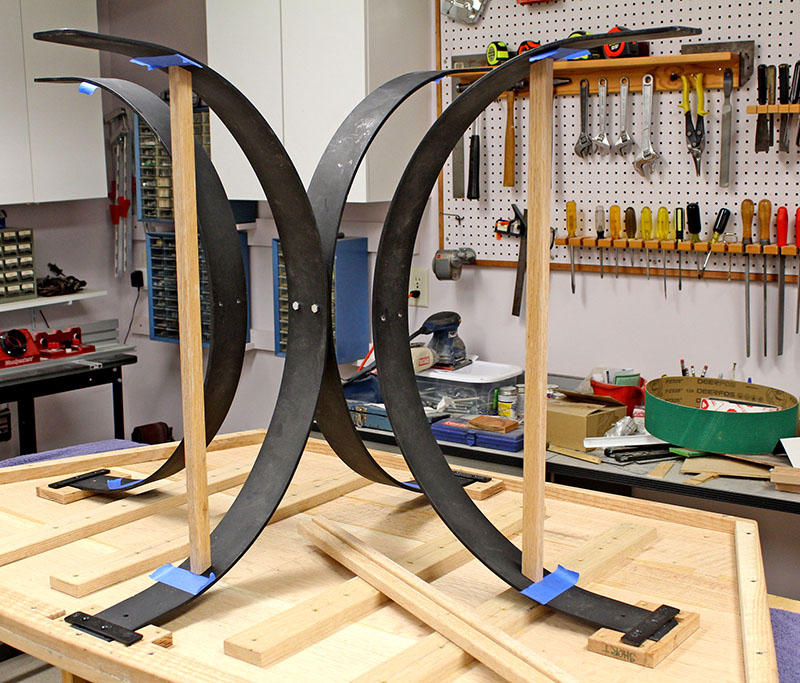
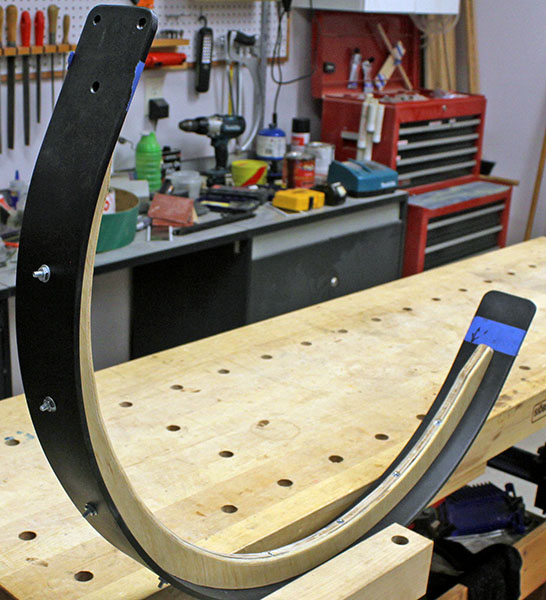
Four semi-circular three-inch steel legs forged by a blacksmith friend will support the table. The front-to-back pair will be bolted touching each other, while the end-to-end pair will be separated by 12 inches, as marked on the plan, not the three inches seen in this photo. The legs are represented by green rectangles in the plan above. (The blue rectangles are stringers attached to the table underside for additional strength.)
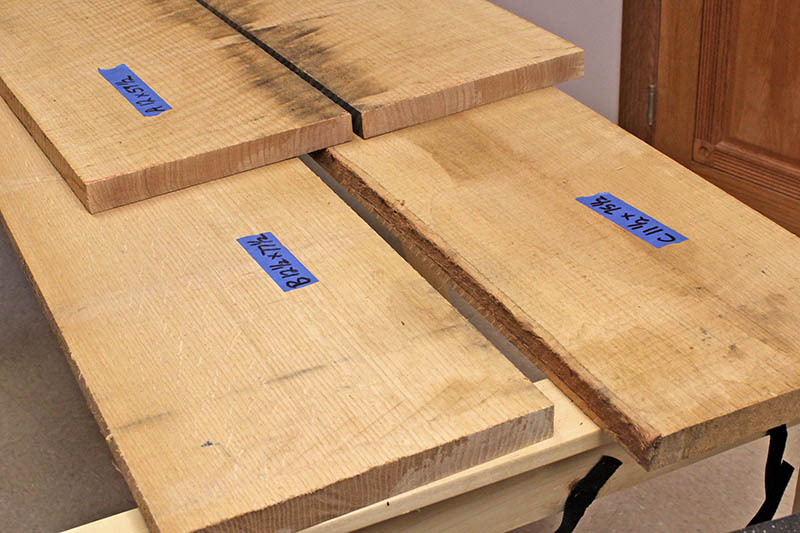
We drove 50 miles to a lumber yard that specializes in rough-sawn hardwood. We bought 47 board-feet of 5/4 quarter-sawn red oak.
5/4 lumber is 1¼ inches thick. We will joint the edges and plane the thickness to one inch (typical big-box store lumber begins as 4/4, and is finished to ¾-inch thickness).
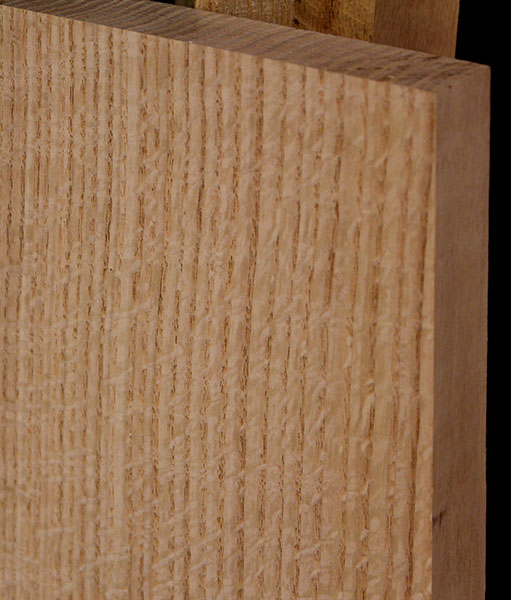
This is nice wood! Quarter-sawn boards don't warp or cup nearly as much as plain-sawn boards, and they display a beautiful grain pattern when finished. Chris at the lumber yard told us all this wood came from the same tree. We look forward to working with it.
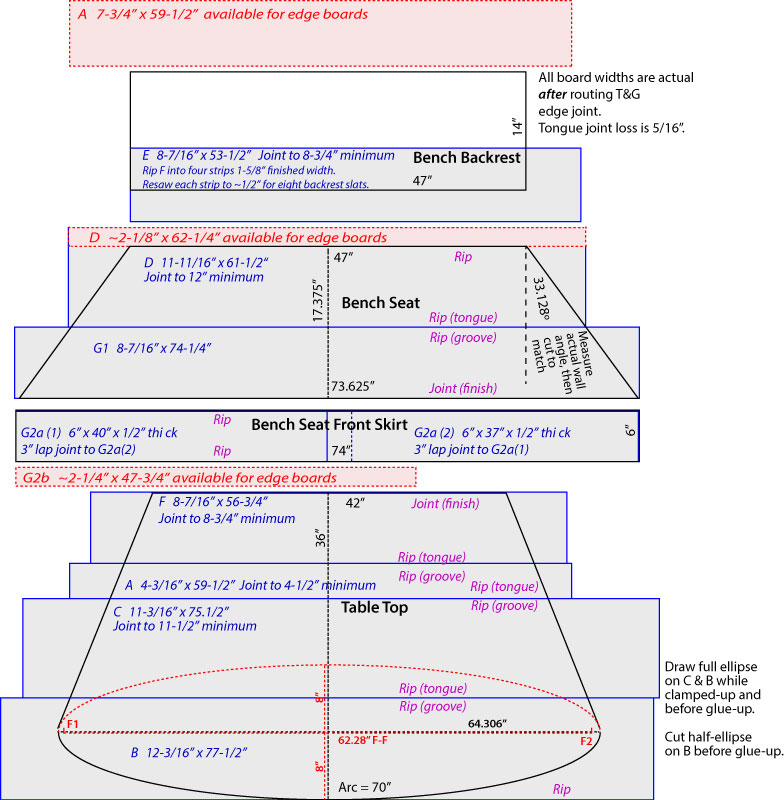
This is how we plan to use the oak planks after we turn them into 1"-thick finished boards. We'll attach narrow inch-thick strips around the perimeter of the table underside, and round-over the top and bottom edges with a ⅜" radius.
Click here to read the work plan Mike drafted to keep us on track and not waste the expensive oak lumber. The file opens in a new browser window; close it to return here. Or right-click to save the 171 KB PDF file to your hard drive where you can read it at your leisure.
Our neighbor Harry expressed an interest in woodworking, so Mike invited him to join the project. Today they spent five hours struggling with plank E, trying to plane and joint it into a 1"-thick board. But every pass through the planer resulted in a broad curved pattern across the grain, as well as small gouges. ultimately, with Louise's blessing, they declared the board "good enough." It's thinner that the desired 1", but we decided it can be used for bench backrest slats.
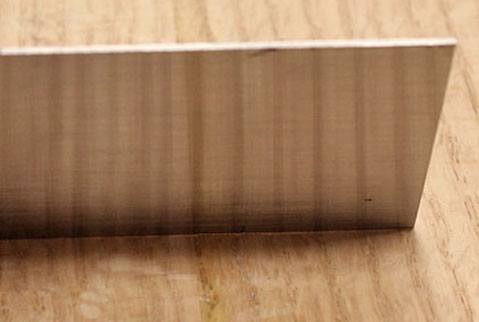
Mike and Harry made better progress today. First they planed one surface flat on each plank to allow it to slide easily through the jointer. Then they jointed one edge on each plank to provide a straight edge for later ripping on the table saw. Every plank turned out much better than yesterday's Board E. They can't explain why; perhaps E had a different grain structure.
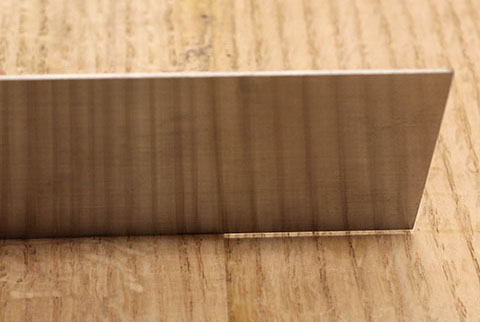
This photo shows part of one plank with its planed surface and jointed edge.
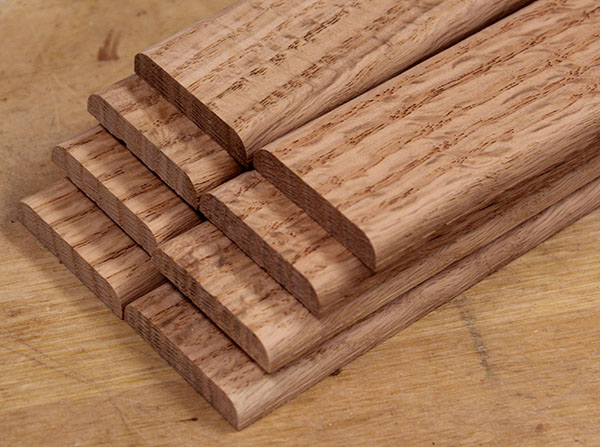
It was a major effort to run the 5/4 oak planks through the planer and the jointer, so afterward Mike and Harry decided to take a break and turn Board E into eight slats for the bench backrest. They ripped it into four 2"-wide strips about 1" thick. Next they began to use the band saw to "resaw" each strip in half to about ½" thick. Unfortunately, the blade began to wander, so the band saw did not make a straight cut.
They switched to the table saw, which did the job. After planing, the resulting eight slats are 5/16" thick. Mike and Harry used the table router to round-over two edges on each slat to a ¼" radius. This photo shows the eight slats.
Mike spent 12 hours over three days revising the plans for how the boards will be used, then modifying the work plan to match. He decided to rip most board edges smooth, instead of jointing them, because the ripped edges will be routed into tongue-and-groove joints (and thus will be invisible) or, in the case of the bench, will be adjacent to a wall.
Mike expanded the work plan in an attempt to cover every step. This can get tricky because everything must be in the right order, and it's easy to overlook small details.
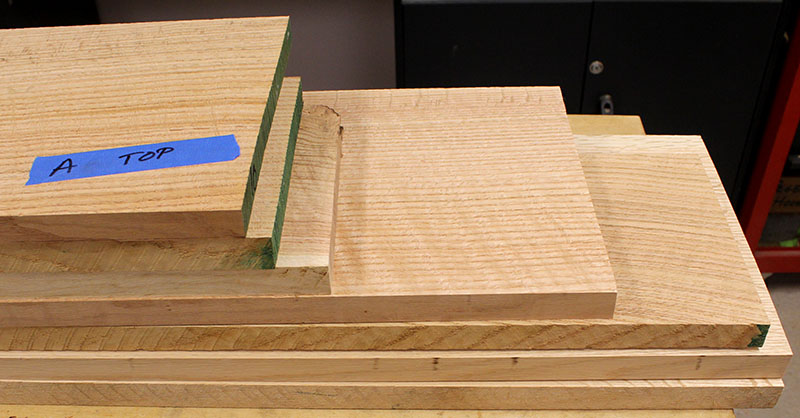
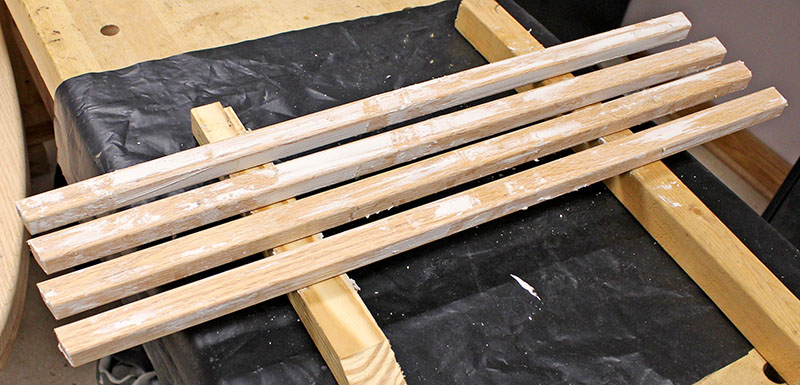
Mike and Harry spent four hours planing all the boards to nearly their final thickness. They planed Board A to one inch, and declared it to be the master thickness reference for all boards. They planed the remaining boards to one inch plus 1/64".
One more pass (tomorrow) through the router set to Board A's reference height, and all boards will be 1" thick, and ready to turn into the table and bench. Here is a shot of today's work.
Mike and Harry spent four hours planing all the boards to their final one-inch thickness to match Board A. Next they ripped the boards to their final width, and test-clamped three of the four table top boards together to determine how wide Board A must be ripped to yield the final 36" depth. Answer: About four inches. The remainder will be used for the edge strips on the perimeter underside.
Board C's edges weren't straight – one edge bowed outward, and the opposite edge curved inward. Mike and Harry used a circular saw and an aluminum saw guide to cut both edges straight.In the evening Louise and Mike discussed the edge strips, and concluded that ½"-thick strips were better than the 1" strips originally planned.
Mike and Louise worked for several hours to complete Board A for the table top. They needed to rip a 5"-wide length from the board, leaving the remainder for other uses.
Unfortunately, neither edge on Board A was straight, so they decided to use the circular saw and aluminum saw guide to cut one edge straight, then rip it as Mike and Harry did yesterday. For some reason, the "straight" edge didn't turn out very straight, so Mike used a hand plane to level it out. Then Mike and Louise ran the board on edge through the planer to make both edges as straight as possible.
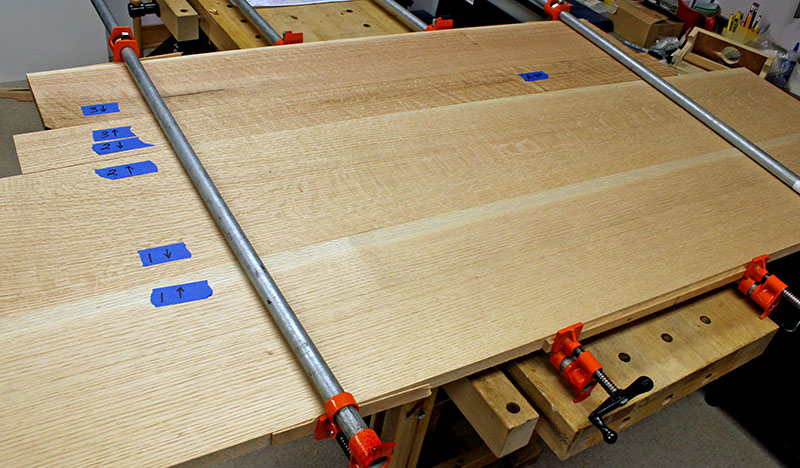
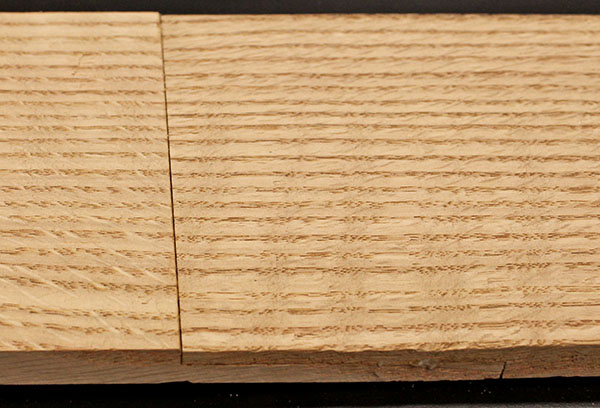
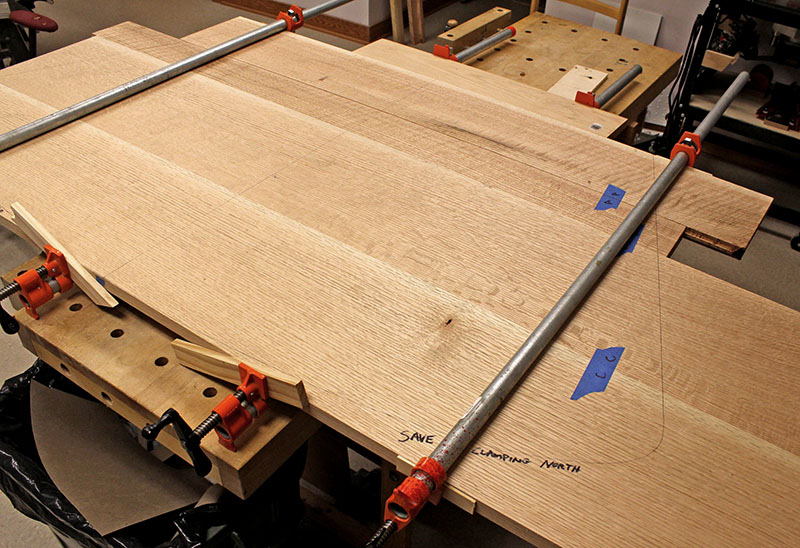
Board A is not perfect, but all the table top boards clamp together reasonably well, with only a couple of minor gaps in the edge joints. This photo shows all the top boards test-clamped together, with mating edges labeled on blue tape to eliminate future confusion.
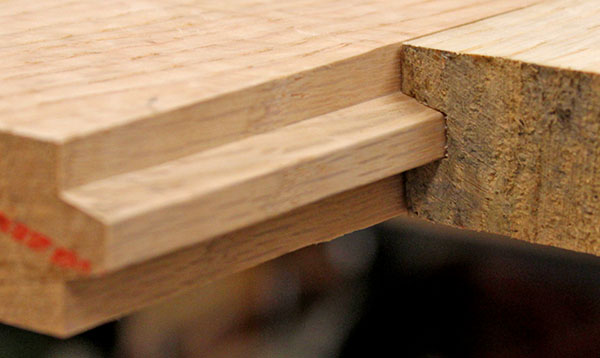
Mike and Harry ripped a 1½" strip from the Board A cutoff, and cut it into 5" lengths for setting up the tongue & groove router bits. First they set up the tongue bit, and routed tongues on four table top and bench boards. Then they set up the groove bit and routed grooves on the four mating boards. Here's a photo of a T&G joint on the table top.
Unfortunately, the tongue on one bench seat board rose toward one end, so We'll have to rip it off and try again. Thankfully, this board is wide enough for two or three attempts.
Mike and Louise used corrugated cardboard strips and hot-melt glue to make a template of the space available for the bench seat in the kitchen bay. They laid it on the seat boards, and were pleased that it fit with a bit of extra wood all around.
With the boards ready to assemble, Mike spent seven hours over two days adding detailed steps to the work plan for just how we'll do that.
Mike and Louise sawed-off the defective tongue on one bench seat board, then set up the router table, and outed a new one. It turned out well, but the boards are warped enough that an area on one is slightly higher than the mating board. Sanding after the boards are glued together will remedy that.
The final operation was to rip the board to its final width. Here's a photo of the seat boards clamped together, with the shape template on top. The seat is 17¾" deep.
Mike and Harry worked on the bench seat for about four hours. Harry marked and drilled the three stringers that span the T&G joint between the two seat boards. Then they applied glue, clamped the boards, and screwed-down the stringers. Here are the glued-up seat boards. The ends still need to be cut off at an angle to match the kitchen bay.
Next Mike and Harry fabricated the six-inch "skirt" that will hang below the bench seat front to hide a cushion-storage shelf beneath it. First they ripped a 1¼"-thick board to 6" wide, then used the table saw to slice that into two ½"-thick boards.
Next they routed a three-inch ¼"-deep lap joint into one end of each skirt board. They glued the boards together at this lap joint, as seen here.
Working alone today, Mike planed yesterday's bench skirt to eliminate a small height difference at the lap joint. Then he turned his attention to the seat itself.
Mike unclamped the seat and removed dried glue that had oozed on top along the T&G joint. The joint is tight but one board is a bit higher in a few areas. Scraping and sanding will fix this.
Next he used a saber saw guided by a straightedge to cut off the ends of the seat at a 31° angle. Then he used a router to round-over the seat edges as specified in the work plan.
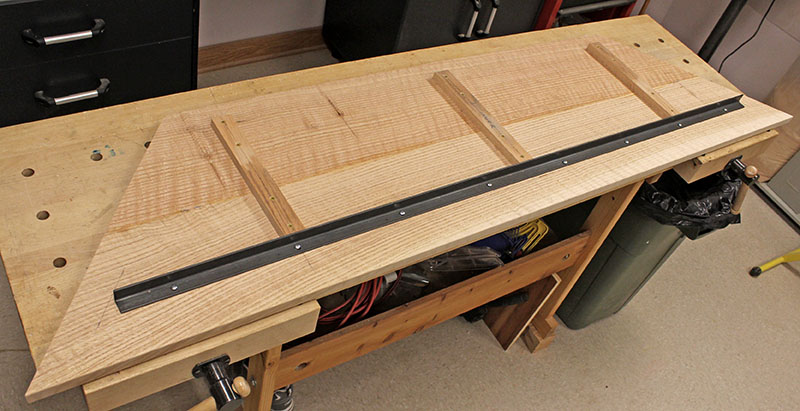
Finally, Mike cut a 1" angle iron to 64" long, drilled eight holes in it, drilled matching holes in the wood, and screwed the angle iron securely to the underside of the seat. The metal will reduce flexure over the unsupported 5½-foot span.
This photo shows the underside of the seat with yesterday's stringers, plus today's cut ends and angle iron.
Harry and mike fashioned two pivot blocks for the bench skirt, and puzzled-out how they would work. Several factors are at play, but the bottom line is that the pivots can be mounted only at the ends of the five-foot skirt.
It would be preferable to use several hinges or a piano hinge along the skirt length, but this would result in a ½" gap at the top when the skirt is closed. Here's the idea:
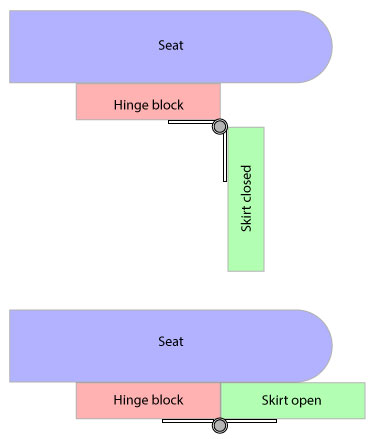
Louise looked at the skirt arrangement, and told Mike the gap is OK, so we'll go with hinges.
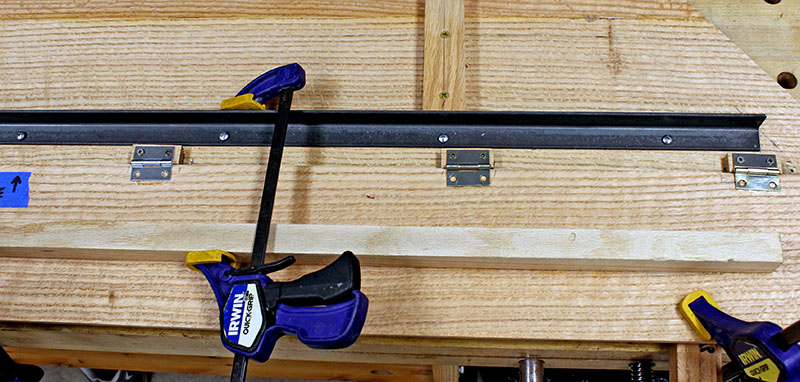
With the decision made to use hinges on the bench skirt, Harry and Mike fashioned small mounting blocks for them.
Next they glued and pinned a five-foot, 1"-square wood stiffener to the back of the skirt, then beveled the skirt ends to 40° so they won't hit the kitchen bay walls when the skirt is hanging in the closed position.
Finally, they screwed the hinges and blocks to the underside of the seat, and applied Amazing Goop viscous adhesive to secure the hinges to the rear of the skirt. Here are three of the six hinges with everything clamped-up while the Goop cures.
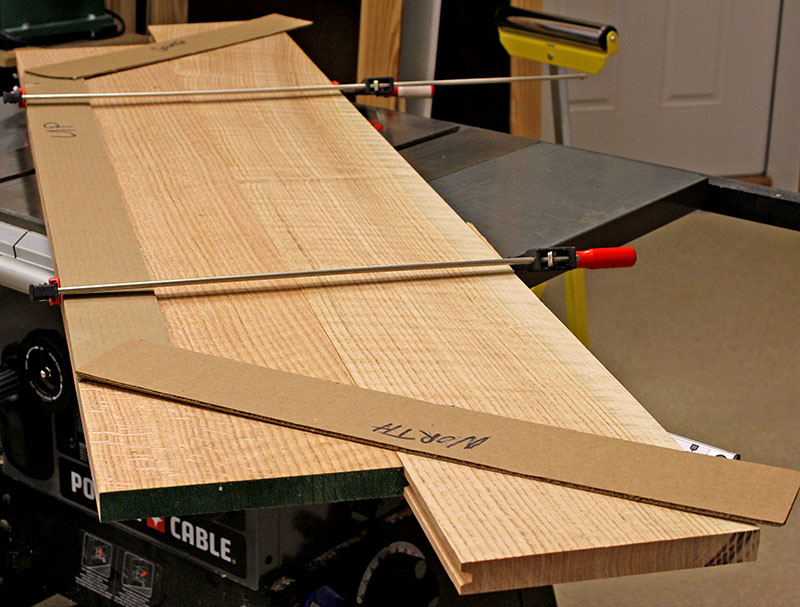
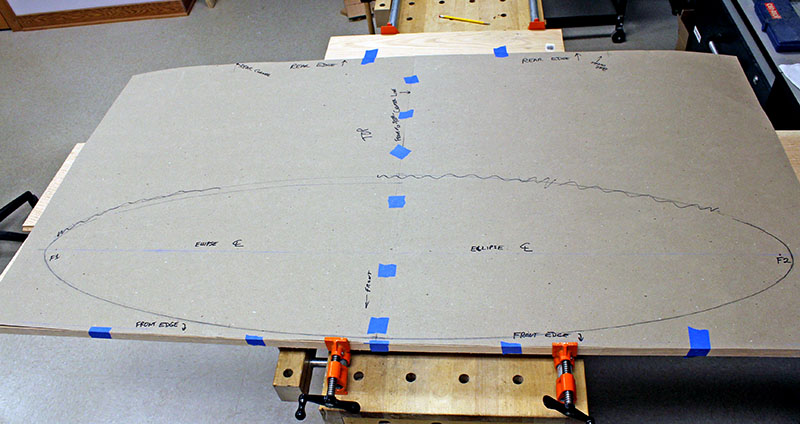
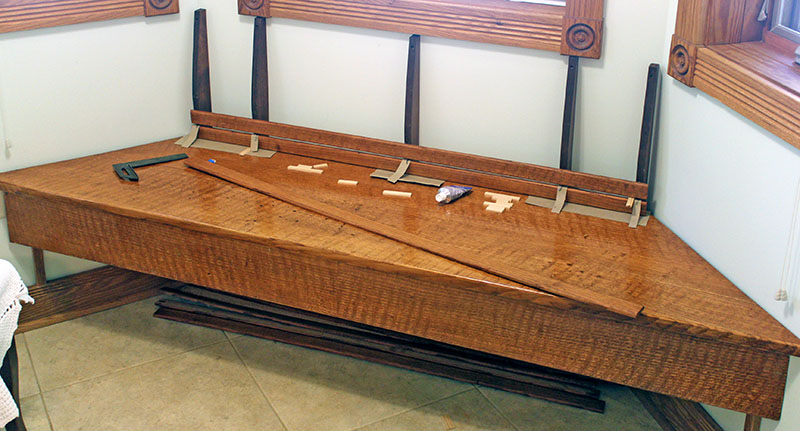
The bench seat and skirt are complete, so Harry and Mike set them aside and began laying out the table top. They clamped together the four table boards for a flat work surface, then laid down two large pieces of cardboard and marked various lines and points on them.
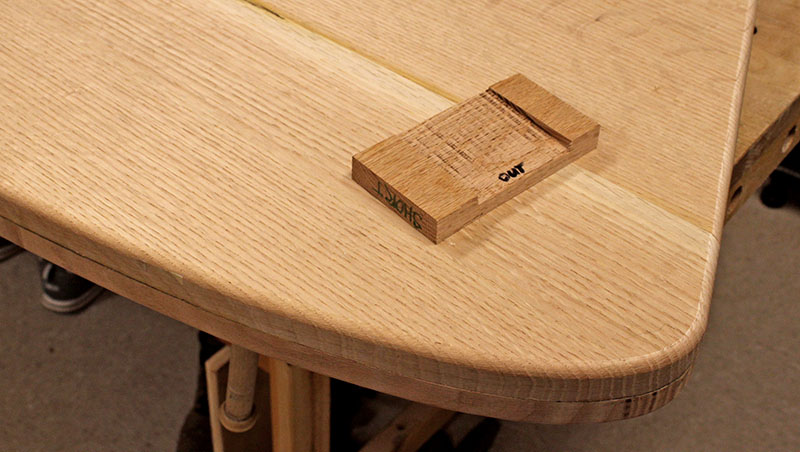
The highlight of the day was drawing the ellipse for the table front edge. An ellipse contains two focus points, and the oval shape is drawn by tracing along a string anchored on these points. Mike's original idea to use parachute cord didn't work well because the paracord stretches under tension. Harry suggested using wire, so Mike found some #24 copper hookup wire that worked much better.
This photo shows the half-ellipse near the front edge of the table. The lines on the opposite half are leftover test traces.
Mike and Louise confirmed the final table shape drawn on the cardboard template, then cut out the shape. They shifted the template and the boards left-and-right to include only the wood with the fewest surface defects.
Next they transferred the template's front-to-back centerline to the underside of the still-clamped boards. Then they applied strips of blue tape across the T&G joints on the underside of the boards, labeled them, and sliced across each tape. These will serve as alignment guides later.
Finally, they unclamped the boards, turned them upside-down, aligned the tapes, and clamped the boards tightly. Then they laid the cardoard template on the boards, and Mike traced around it. Here are the boards ready for the next marking and cutting steps.
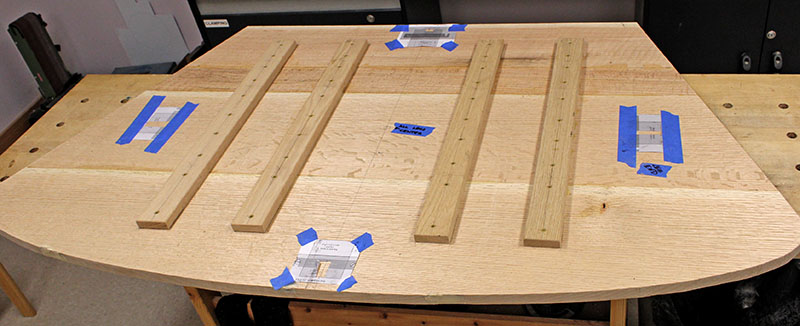
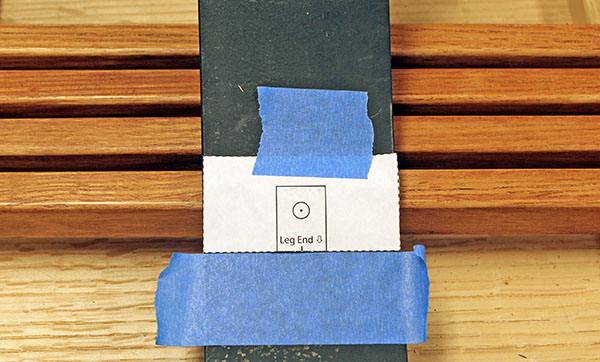
Following the work plan, Mike and Harry measured and marked leg attachment points on the table underside, using full-size printed diagrams of the mounting pads.
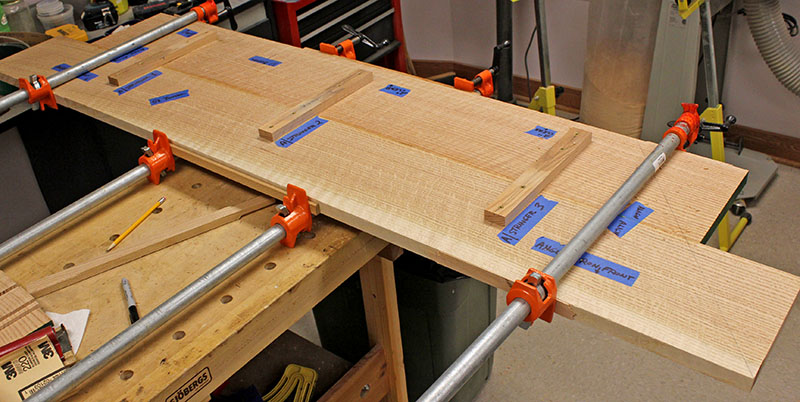
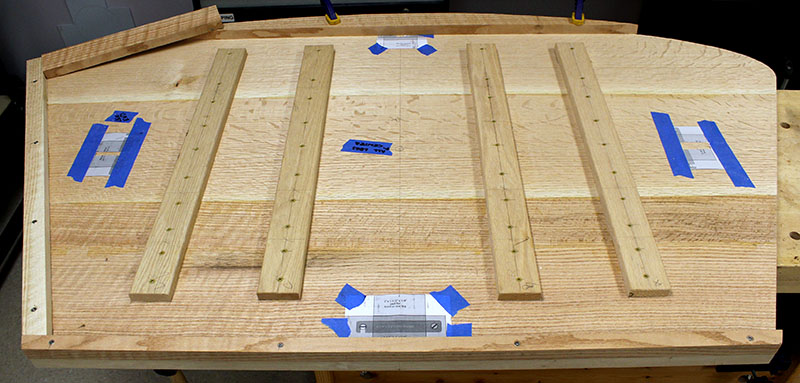
Next they cut four stringers that will run across the joints between the boards, and drilled holes for 10 screws in each stringer and the table. The stringers will perform an important function as the boards are glued – hold the boards securely while gluing the next board.
Explanation: One joint will be glued and clamped at a time, and the stringers will be glued and screwed across that joint while the clamps are tight. Then the clamps will be loosened, and the next joint will be glued and clamped. The stringers will be glued and screwed across that joint and so on for all three joints.
Here the four leg-attachment diagrams are taped to the table underside, and the stringers are resting in their final positions.

Mike and Louise glued the table boards together, and glued and screwed the four stringers across the joints. No photo today, since everything looks pretty much the same as it did in yesterday's photo, above.
Next step: Saw the table along the template outline.
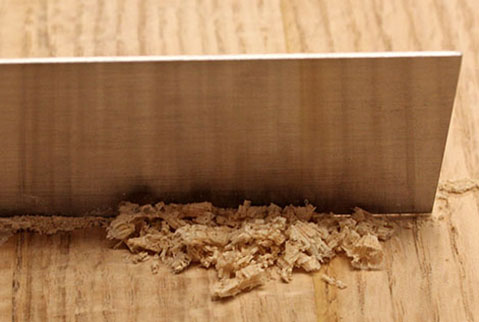
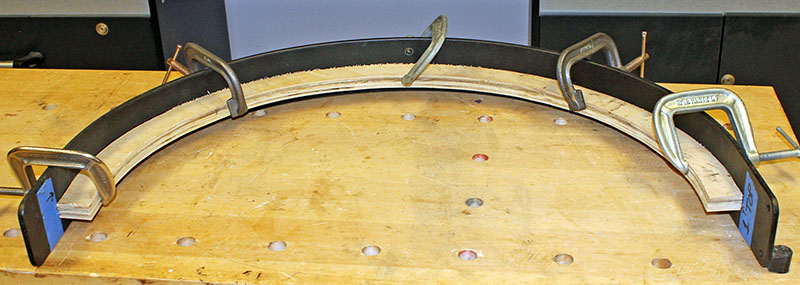
Mike removed the clamps from the glued-up boards, and heard no snaps or cracks – the glue and the stringers are holding everything together. Then Mike carefully guided the saber saw along the template outline marked on the underside of the table. The edges turned out fairly well, but the half-ellipse is a bit uneven in spots. We ought to be able to correct these later.
Harry and Mike made good progress on the table edges today. This involved a number of steps:
This is the underside of the table after today's work. The rear edge strip is in the foreground, and the end strip is to the left. The clamped curved front strip in is the background, with the filler strip resting between it and the end strip.
Before Harry arrived, Mike began working on the leg mounting pads. He planed 1" oak to ½" thick, then cut 3" x 6" pads. When Harry arrived, they began routing a ¼"-deep channel across a pad, but this didn't work well. Mike decided to use a dado blade on the table saw, and Harry successfully cut the channels.
Next, Mike and Harry cut and installed the remaining edge strips on the table. That went well, and now all edge strips are ready for flush routing.
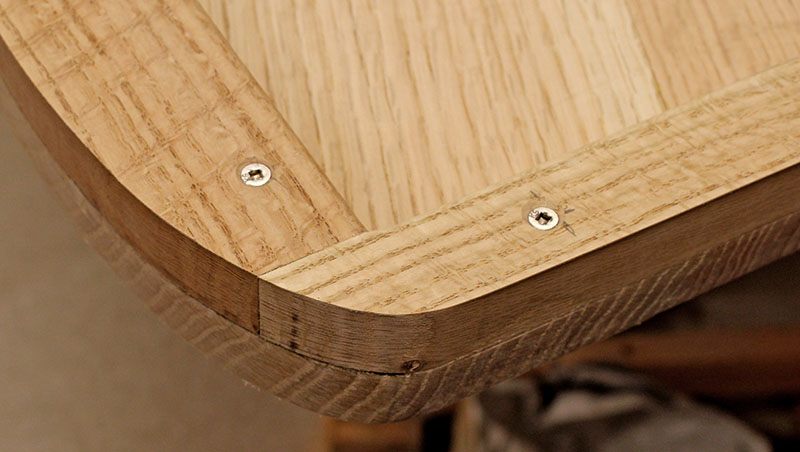
In the evening, Louise and Mike inspected the day's work, and set the front/back legs on their mounting pads. This photo shows those legs and the edge strips around the table perimeter.
No work yesterday, due to Mike's eye doctor appointment and resulting blurry visiion. Today Mike flush-routed the strips on the underside of the table to match the edges sanded on May 27. The result is pretty good, but will need further sanding to remove a ledge in some areas. Mike also rounded-over the interior edges of the strips to a ⅛" radius.
Here is a portion of two flush-routed strips matching the table edge beneath. The darker strip's rounded-over interior edge can be seen to the right of the screw.
Mike used a router to round-over the table's top and bottom edges to a ⅜" radius, while Louise handled the dust collector hose to catch as many chips as possible.
Afterward they made new leg mounting pads because they discovered the flat tops of the legs angle slightly. Mike glued temporary spacers to one edge of each pad to elevate it, then used a dado blade and multiple passes on the table saw to cut a wide sloping slot. After each pass, Louise shifted the rip fence ¼" and Mike took another cut until the slot was 3" wide.
Here is the table top with its rounded edges, and a leg pad to show the sloping slot.
Mike scraped the table top to remove slight height variations along the dovetail joints. Scraping involves pulling a rectangular steel blade held at a steep angle along the boards. Doing this scrapes thin layers of wood from the surface, leveling it and removing humps.
These photos show an area where one board is higher, the shavings produced by scraping, and the same area after scraping.
|
|
|
|
Make no mistake – scraping is hard work! Each of the three joints required more than half an hour of scraping. The blade must be held tightly with both hands, pressed down firmly, and drawn slowly along the wood.
After 10-15 passes, the blade must be sharpened by filing each edge and "turning the burr" with a piece of hardened steel to form the cutting edge (read about it here).
No visible progress over the past five days, but Mike has been testing two grain fillers to learn which gives the smoothest surface with the fewest coats and sanding. So far, it looks like the paste with finely ground solids is better than the gel that shrinks into voids as it dries, and requires many coats to fill them.
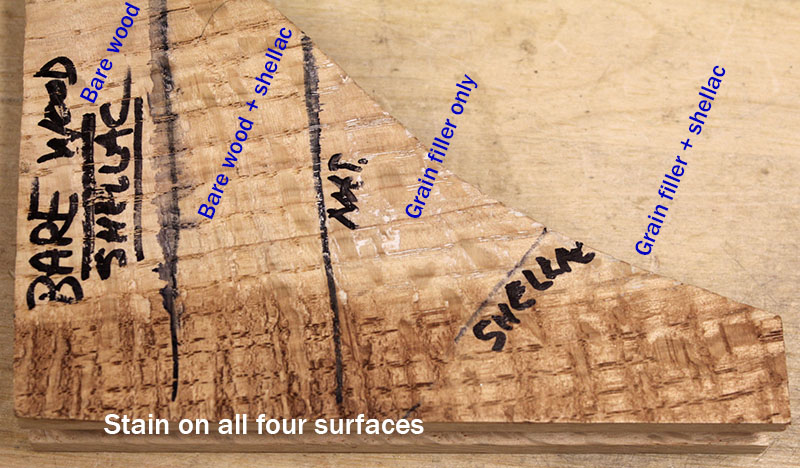
On Monday, Louise and Mike visited the Woodcraft store to see how shellac and various stains change the appearance of the oak wood. They bought a quart of "cherry" dye stain.
Once home, they decided to use the "natural"-color paste grain filler, so Mike spread that on wood scraps. Then he mixed some dewaxed shellac, and applied that to portions of the wood. Finally, he wiped stain over part of all four areas.
Here are the final tests. Applying shellac over the grain filler darkens the whitish areas where gouges are filled, making them less visible. Furthermore, where stain is applied over shellac, the grain is not as dark as the other areas. Bottom line: Stain over shellac over grain filler is best.
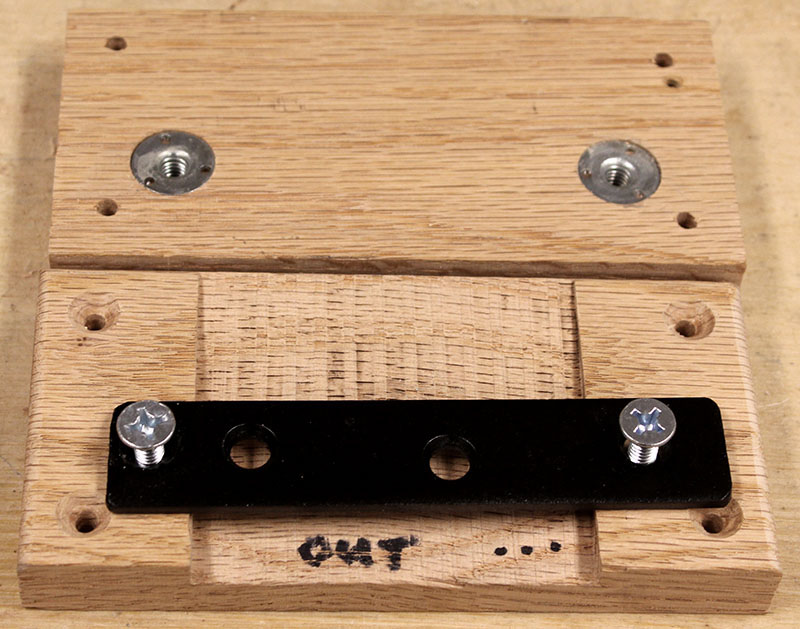
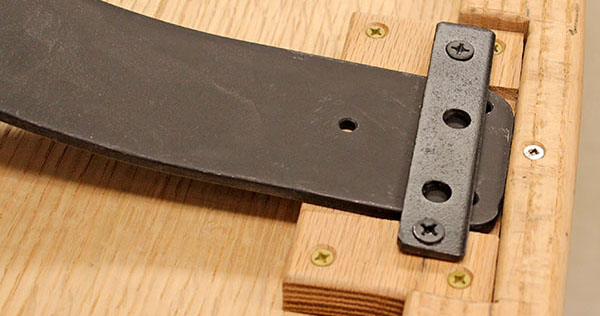
Mike bought some flat-head bolts and tee nuts, then drilled the leg mounting pads for the metal straps that will hold the legs in place. Here are two pads showing the tee nuts on the underside, and a metal strap with screws in place over the sloping dado that will hold the leg.
Mike and Louise installed the four leg mounting pads and secured the legs with the metal hold-down straps. The front/rear legs are bolted directly together, but the end legs are separated by 12", and bolted with ¼" threaded rods. Mike made oak spacers to provide a firm connection.
Here is the upside-down table with all four legs attached. Below this photo are closeups of a leg attachment and the oak spacers between the end legs.
|
|
In the evening, Louise and Mike set the table on the floor, resting on its new legs. Uh-oh! The legs are springy, so the table bounces when weight on it changes. Even resting elbows on the table results in bouncy-bouncy. It's time to think more about table legs.
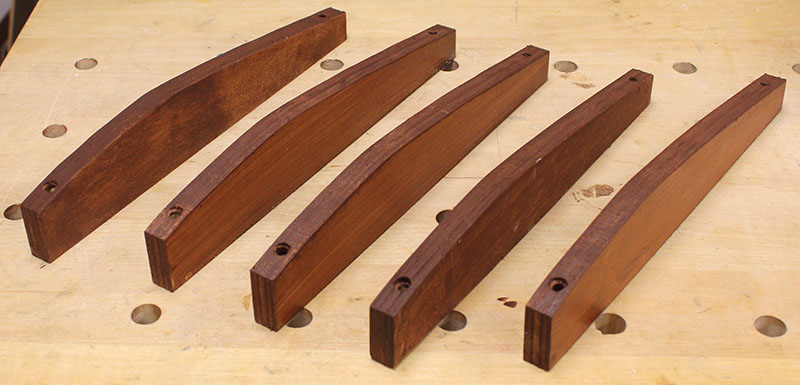
After mulling-over the spingy legs for several days, Louise and Mike worked out how to install vertical braces between the top and bottom of the half-circle legs.
They ripped ¾" oak into 1"-wide sticks, and beveled the ends to fit in the semicircle, inset 6" from the leg ends. These will make the table much more rigid.
Mike rounded-over the edges with a ⅛" radius, then wiped-on grain filler. Once dry, he'll sand them smooth and finish them the same as the table.
Mike and Harry scraped and sanded off the excess grain filler from the leg braces. Then they and Louise struggled to work out how to find the right positions for the vertical braces on the curved legs. Eventually they decided to inset the ends of each brace 7⅜" from the leg ends. They'll drill holes in the leg, and use ¼" lag bolts to secure the braces.
Mike mitered the ends of the braces to 20° angles because the original angles were slightly wrong. Then Mike and Harry spent an hour carefully measuring and marking with blue tape the 7⅜" insets. It was difficult to see pencil or scribe lines on the black legs, so ultimately they cut a stick to the right length, sprayed white paint on one end, tapped a white line onto the leg, and laid blue tape over that line.
This photo shows two braces temporarily propped in their blue-tape locations.
Mike created and printed templates for the ends of the leg braces, showing where the lag bolt hole must be drilled. These templates are taped adjacent to the blue tape markers. Each hole will be center-punched in the tiny circle on the template, then a ¼" hole will be drilled through the leg.
Afterward, Mike wiped shellac onto the four leg braces, and when that was dry, he wiped-on dye stain. This photo shows the stained braces behind a leg with a drilling template.
It's been a long time since the last update, but we haven't been sitting idle. We attached the legs and turned the table upright. That's when we discovered it is very unstable. The wood braces did not stiffen the legs sufficiently, so the table still is "bouncy."
Nevertheless, while the table was resting on its legs, we sanded it smooth and aplied stain. Mike also filled the grain on the bench seat and skirt, then sanded and stained those. Finally, he applied three coats of wiping varnish to them. These two are finished and ready to install.
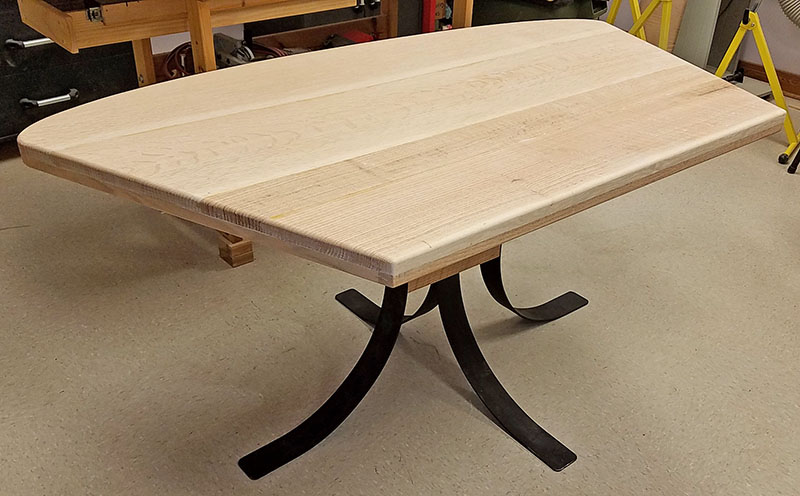
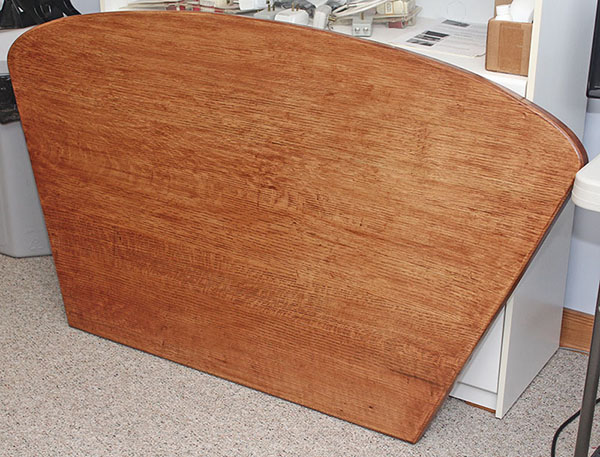
Then we removed the legs, and carried table top and bench seat into another room for storage while we work out how to deal with the legs. Here's the table top with only stain applied – no varnish yet.
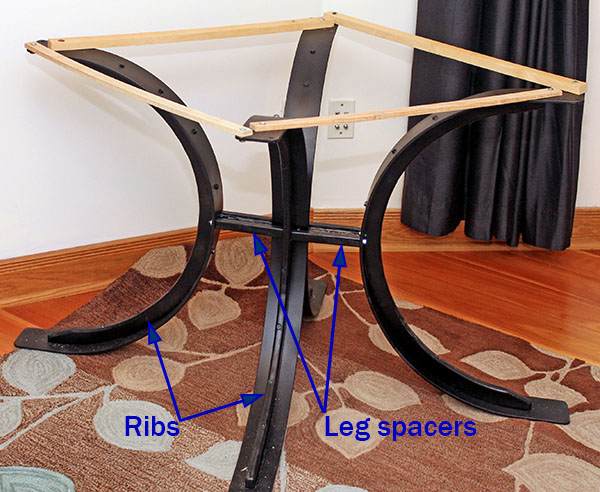
We decided to see if a blacksmith could fabricate 1"-deep curved steel ribs, then weld them to the concave side of the legs. We found a local blacksmith, but he's too busy to do the job. Instead, he suggested using wood instead of steel.
We bought a 2' x 4' sheet of 10-ply cabinet-grade birch plywood, and Mike machined a 3" Delrin disk with a center hole to trace a curve 1½" away from the leg. He worked out how to fit all four legs on the plywood, then traced the curves. This is the plywood, ready for the ribs to be cut.
If the plywood ribs don't stiffen the legs well enough, we'll scrap the metal legs entirely, and build a trestle base for the table.
Mike used the saber saw to cut out the first plywood rib. He clamped it to a leg, then tested the stiffness of the leg compared to one without a rib. Good news! The rib makes the leg much stiffer. Pulling one end of the bare leg deflects it about an inch, but the same force deflects the ribbed leg less than ¼ inch.
Mike will cut the remaining ribs on the band saw, round-over the interior edges, and prepare them for painting black. After that, he'll drill ¼" holes in the legs for lag bolts, and attach the ribs.
Over the past three weeks, Mike accomplished these tasks:
Here is a leg with its rib attached. The screws protrude on the back of the leg, but they will be largely unseen, and will be painted black.
After we assembled the legs on the table, we'll need to cut notches in two ribs to clear the threaded rods connecting the end legs, then paint the legs and ribs black. After that, we'll finish the table top, and install the bench in the kitchen.
We finished the table top by adding and "feathering" stain until it looked good, with no obvious light or dark areas. Then Mike applied four coats of wiping varnish, allowing each to dry thoroughly. Then he smoothed the varnish with 800-grit sandpaper.
With the legs attached to the table top, we secured the front and back legs together with bolts and nuts. Then we secured the side legs with 12"-long threaded rods and nuts. Mike fashioned oak covers to hide these spacers, and glued them in place with Goop adhesive.
Days later, we unbolted the legs, lifted off the table top, and carried it to a nearby room to wait until the kitchen is ready for the table.

Without the top, the end legs can pivot relative to one another, so we drilled holes in four sticks, and bolted them in place to help keep the legs aligned during transport to the kitchen. This photo shows the legs and their ribs, plus the leg spacers hidden by black wood covers. The temporary sticks are bolted to the leg tops.
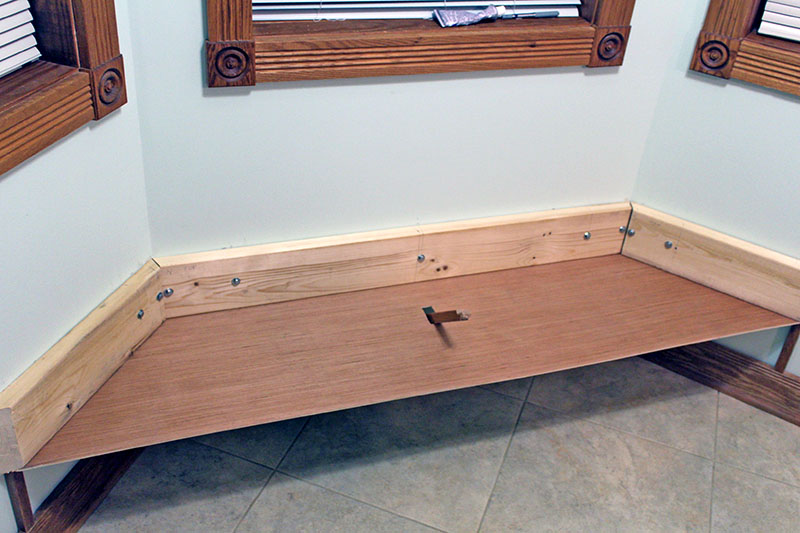
Yesterday we cut and attached the 2x6 supports to the kitchen bay walls. When we discovered there are no wall studs at the ends of the short 2x6s, we added short 1"x¾" oak legs from them. The legs are glued to the top of the oak baseboard, which rests firmly on the floor.
Today we meticulously measured and cut a 1"x¾" oak center brace to keep the bench from sagging under the weight of two people sitting on it. Then we cut a thin plywood shelf to hold seat cushions, and attached it to the bottom of the 2x6 bench supports. This photo shows the supports with the attached shelf. The oak brace projects through a rectangular hole in the shelf.
With the shelf in place, we installed the bench seat. It and the brace are secured with Goop adhesive, which is very tenacious. We weighted the seat while the Goop cured. The hinged front skirt hides the shelf, but can be lifted open for access.
Today we made five brackets to hold the eight slats for the bench backrest. Mike cut one from ¾" plywood, then Louise traced that shape onto four additional pieces of plywood, and Mike cut those on the bandsaw. They came out very well.
Mike drilled and counterbored two holes through each bracket to attach it to the wall, then we stained all five brackets. Here they are waiting for the stain to dry.
Today we completed the bench backrest by attaching the slats to the five brackets we made two days ago (it took that long for the stain to dry, even with a fan blowing on them).
The upper and lower slats cover the screws holding the brackets to the wall, so if we ever want to remove the backrest, we'll need access to those screws. So those two slats are held in place with only Goop adhesive. We'll peel off the slats to uncover the screws.
We began by gluing the lower slat onto the brackets. To hold it tightly, we drove a finishing nail into each bracket, then bent it down against the slat, with a piece of cardboard to prevent damage.
Next we attached another slat above the lower one. All slats between the top and bottom are fastened with Goop and two 1" pins driven into each bracket by our 23-gauge pinner. This photo shows the lower two slats in place. The finishing nails can be seen bent over the the cardboard pads on the lower slat. The short wood strips set the spacing between slats.
We worked our way up, gluing and pinning each successive slat. At the top, we attached the final slat with Goop only, then used six spacer sticks and three clamps to pull it down and inward until the Goop cures. Here's a photo showing today's progress.

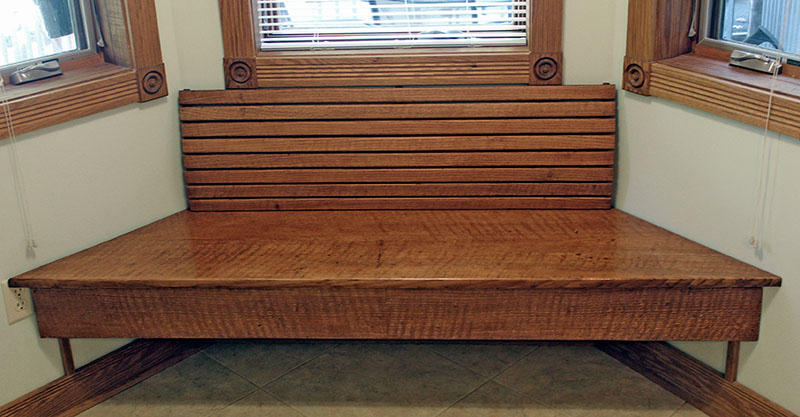
in the morning Mike removed the clamps and spacers from the bench backrest, then shot this photo of the finished bench.
In the afternoon we carried the (heavy) legs upstairs to the kitchen, then carried up the (heavier) table top. Louise applied self-stick felt pads to the bottom of the feet, then we unbolted the four sticks from the top of the legs, and set the top in place.
After some confusion over which metal strap goes on which leg, we fastened the legs tightly Explanation: The screw spacing is not exactly the same on all four straps, so each strap fits one specific leg.
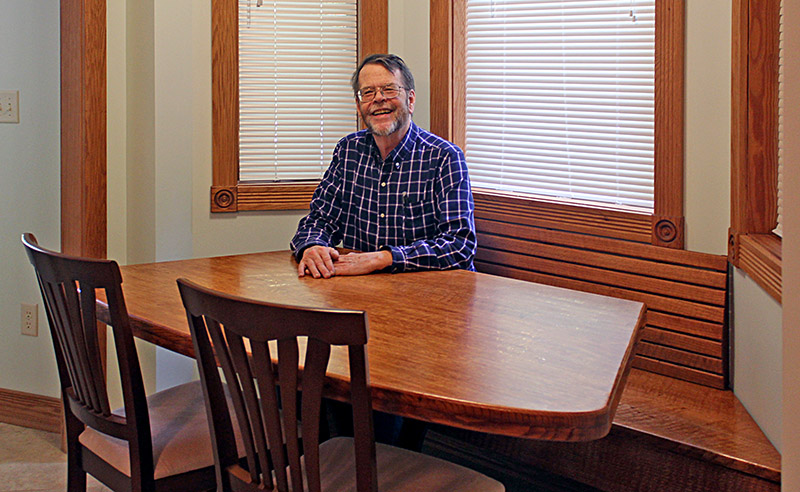
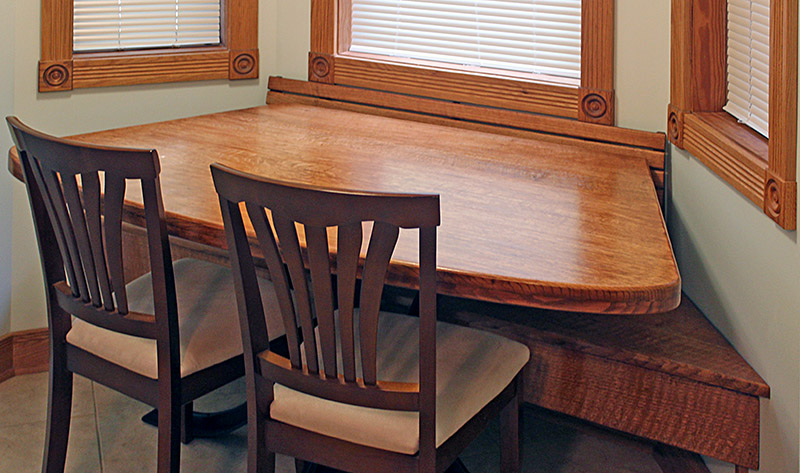
This photo shows the finished table ready for use by four people.
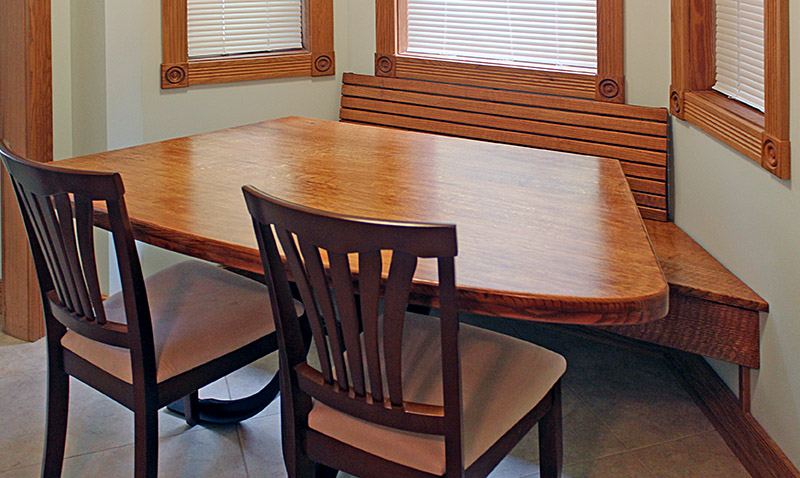
When not in use, we "stow" the table by pushing it over the bench to make more space in the kitchen.
It's been nearly six months since we bought the rough lumber, plus many hours working it. We're grateful our friend Harry helped Mike with much of the initial woodworking. Thanks, Harry!
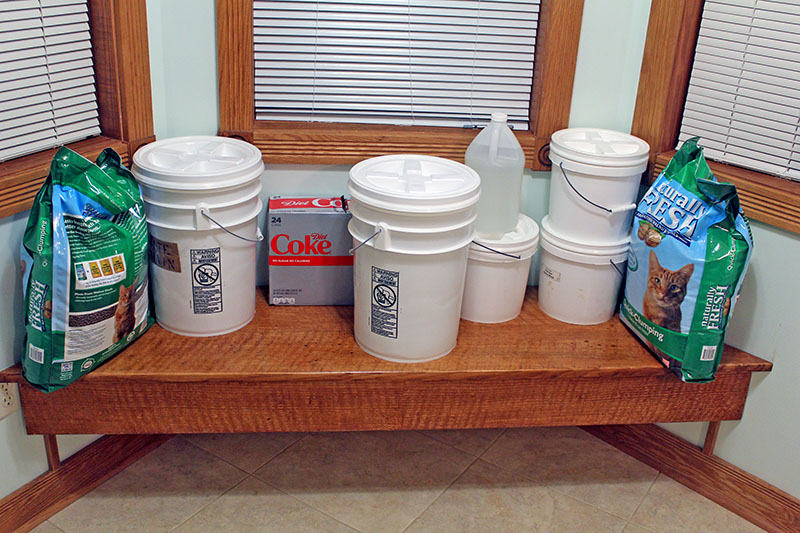
For reference, the kitchen bay looked like this before we made the table.
Updated May 23, 2023