With a bit of advance planning, we can build the walls in the basement shop, then use the tractor and our new trailer to move them to the observatory deck. This is much better than building the walls on-site under the hot sun. Here's how we'll do it.
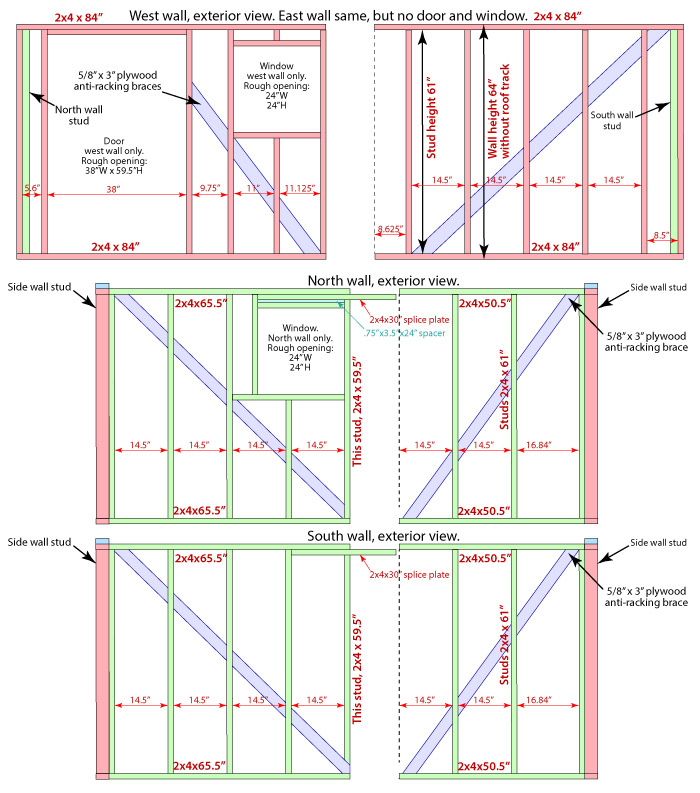
We'll build each 14' side wall as two 7' sections that will be joined when erected. The bottom plates will be nailed to the deck, and the top plates will be connected by the roof wheel track that runs across both sections.
The 10' end walls will be built in roughly 5' sections with splice plates at the top.
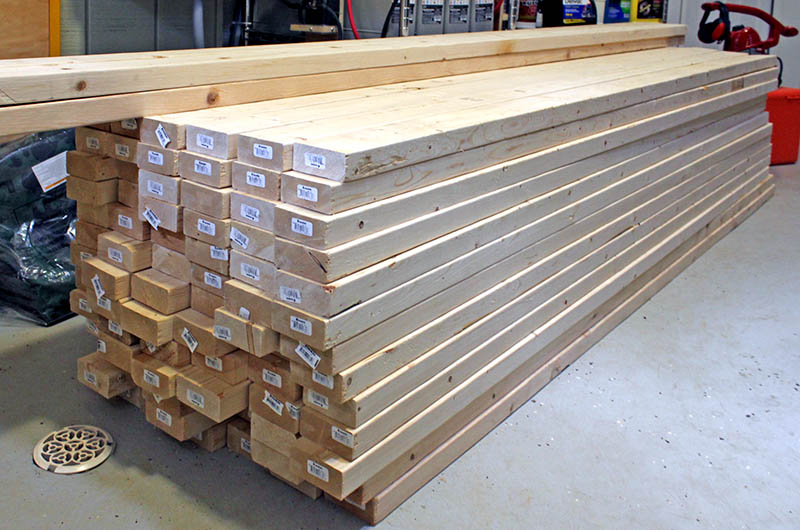
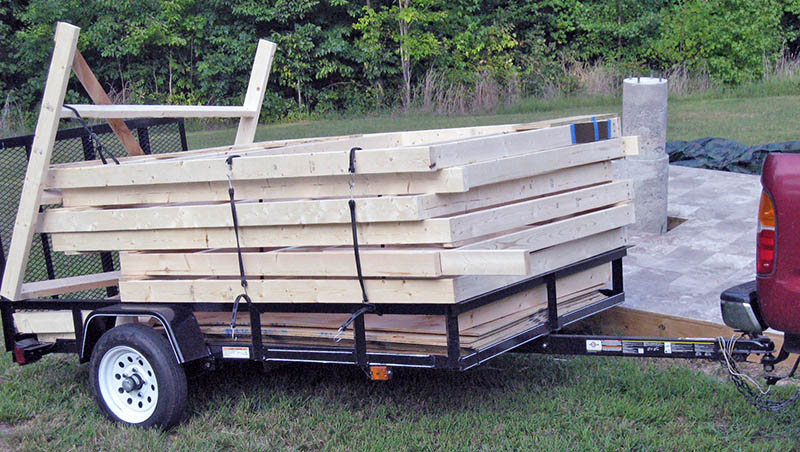
Today Mike drove the truck to Lowe's and bought 78 8' 2x4s, and four 10' 2x4s for the end wall top and bottom plates. Here they are stacked in front of the solar power system batteries in the yard equipment room.
Mike spent much of the day setting up the shop to build the wall sections. He decided to build them horizontally at waist level, laying the lumber on the workbench and two sawhorses. The horses are too low, so he cut some risers and temporarily glued them to the top of the horses.
Next Mike cut approximately 40 61" 2x4 studs for all four walls, and the eight 84" 2x4 top and bottom plates for the four side wall sections. Next he laid the pairs of top and bottom plates side-by-side, and measured and marked stud locations on both at once, for accuracy.
Finally he stacked the cut lumber on the table saw, ready to assemble into walls.
Mike built the two 7' sections of the east side wall today. He started with this wall because it has no door or window that needs special framing.
It took a while to devise a good technique to toenail the studs to the top and bottom plates. Toenailing involves driving the nail at a 55° angle into the side of the stud, so it exits the end and drives into the plate. This nailing causes the stud to move sideways, and pushes the plate away when the nail enters it.
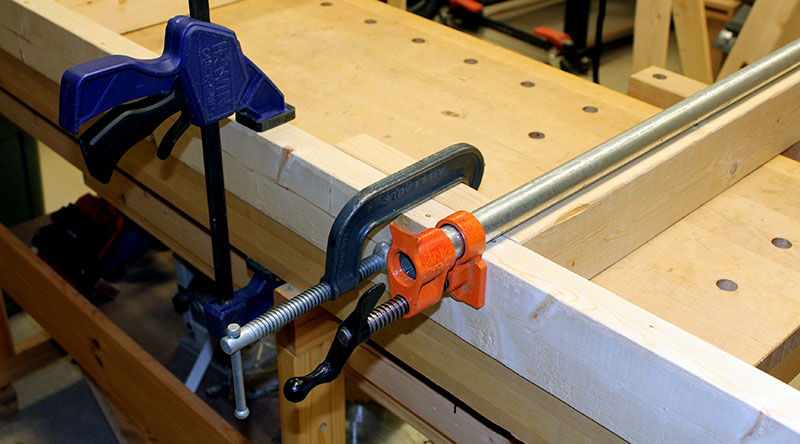
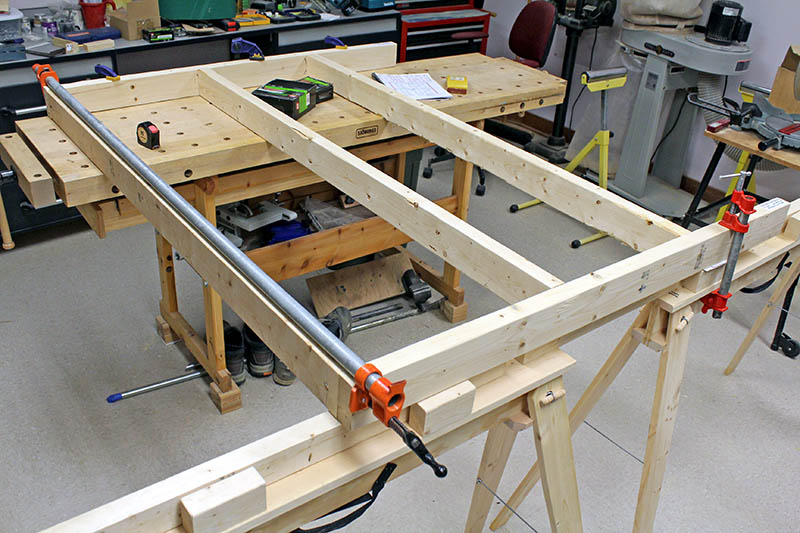
Here's a photo of Mike's solution. The blue clamp secures the plate to the workbench. Another one clamps the opposite plate to the sawhorses. These clamps are tightened after measuring diagonally across the plates and adjusting them for equal measurements, indicating the rectangle is perfect.
The C-clamp holds a 2x4 block to prevent the stud moving sideways. A 6'-long pipe clamp squeezes the top and bottom plates tightly against the stud being nailed. With all this clamping, the stud can't move while being nailed. Mike drives one nail into the side of the stud opposite the C-clamp, then removes the C-clamp and block, and drives two nails into that side.
With the top and bottom plates secured, Mike laid the studs between them and toenailed one end of each in turn. Then he repeated the process on the opposite end of the studs. When all studs were nailed, Mike measured diagonally again, and adjusted the assembly if the measurements were not equal. The first section initially was off by ½", but the second section was dead-on.
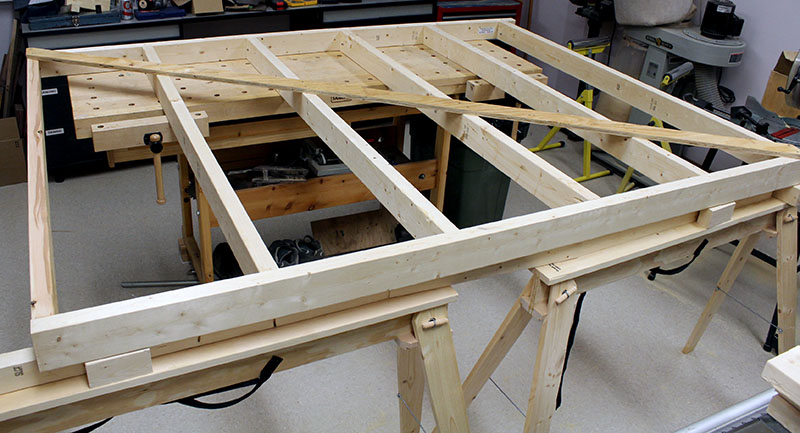
Finally, Mike nailed a 3"-wide plywood strip diagonally across the studs to prevent racking while moving and installing the walls. These strips will be removed after the walls are up and sheathed, since the seathing will hold the wall square.
Louise and Mike stood each section vertically, and moved them into the metalworking shop (closet) for safekeeping until we're ready to erect them on the observatory deck.
This is the second section Mike built – the north half of the east wall. The bottom plate is on the sawhorses in the foreground, and the top plate is on the workbench. The anti-racking strip is on the interior side where it won't interfere with the sheathing.
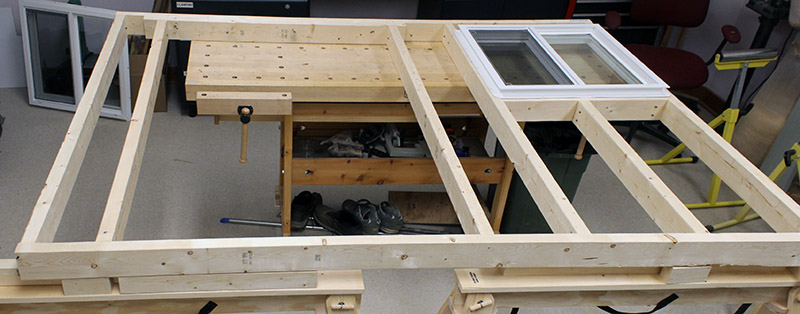
Mike built the the 7' north section of the west side wall that contains the door and one window. Once again, the long pipe clamp proved its worth by locking the 2x4 studs firmly in place while nailing.
This section needed extra effort to frame openings for the 3'-wide exterior door (that we will cut down from 80" to about 60") and a 24" square sliding window unit. Here is the finished section with the window test-fit into its rough opening.
Mike built the 7' south section of the west side wall today. This completes the side walls. Next we will cut-down the 80" door frame to fit the opening in the north section of this wall (photo above), and then cut the door to fit the reduced frame.
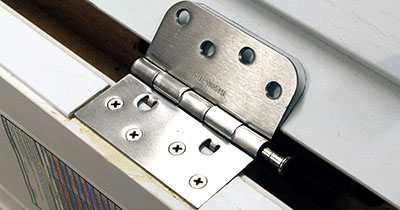
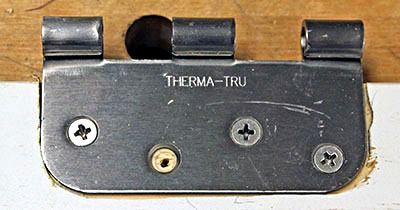
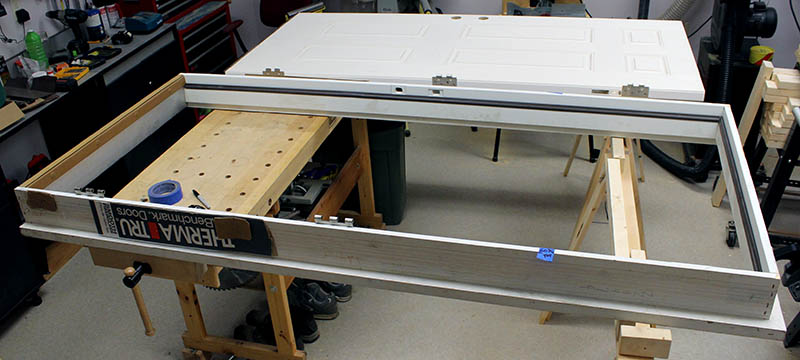
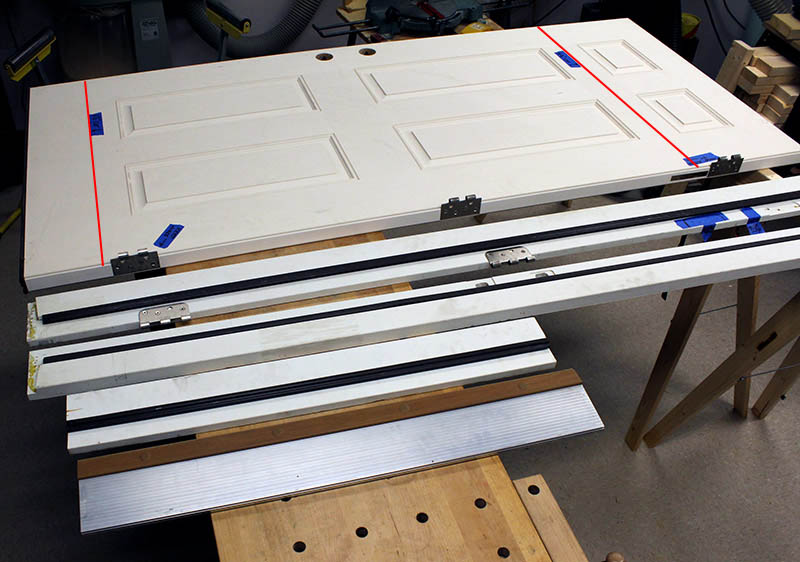
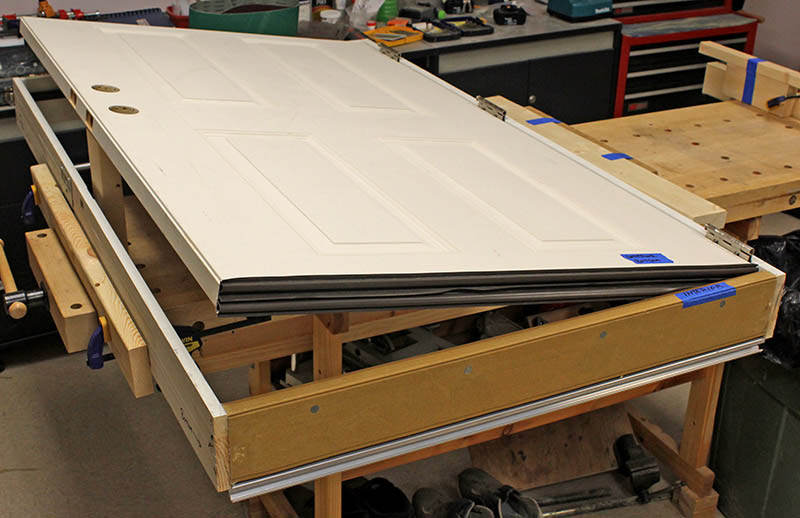
We removed the 80" door from its frame, and laid it and the frame on the workbench and saw horses. Then we carefully measured to determine how much to cut off top and bottom to fit the 61" rough opening in the west wall. We're fortunate that we can preserve the position of the lockset, two of the three hinges, and – most importantly – four of the six panels molded into the fiberglass door. Only the top hinge will need new cutouts routed.
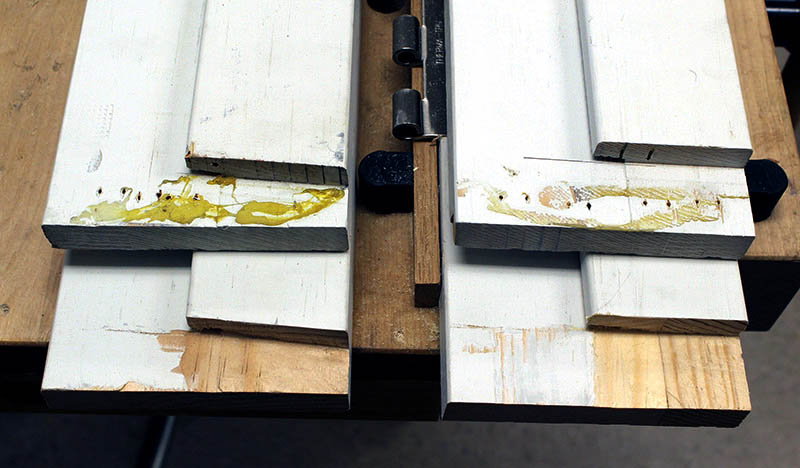
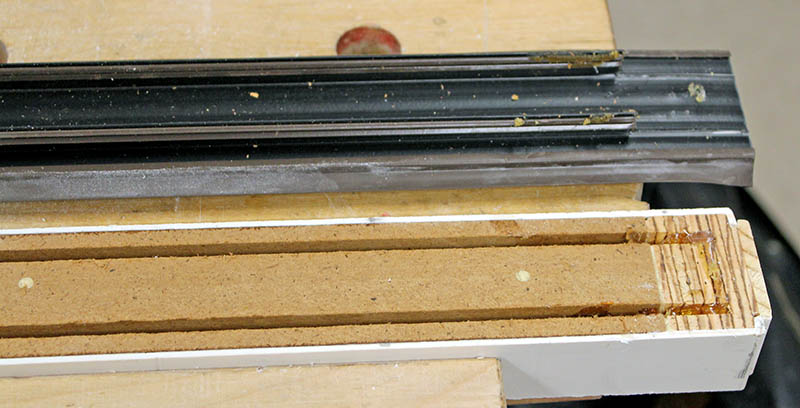
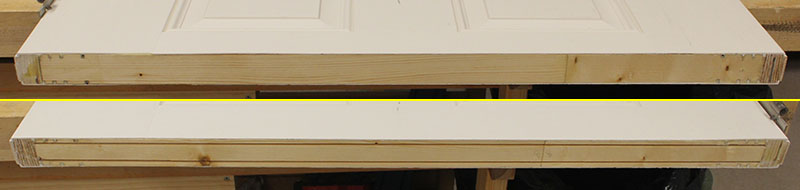
Mike marked cut lines on the frame, and we disassembled it. The upper photo below shows the the door with the frame before disassembly, and the lower photo shows the frame pieces ready to be cut to size and reassembled.
The red lines in the lower photo show approximately where we will cut the door. We'll move the top hinge (right) down 6" or 7".
Mike made good progress on the door frame today.
|
|
|
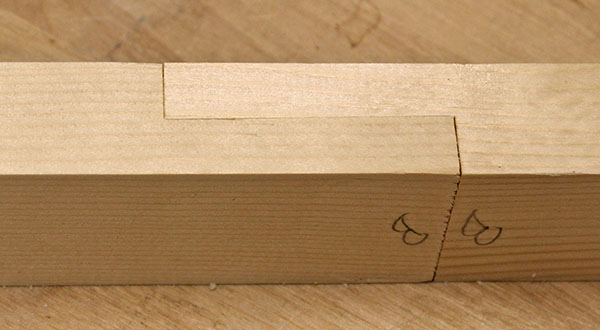
With the hinges done, Mike modified the ends of the side frame pieces. The top end has a cutout for the top piece. The bottom end has a similar cutout, but slanted at 5° for the threshold. This photo shows the factory cutouts on top of the shortened frame sides with Mike's matching cutouts.
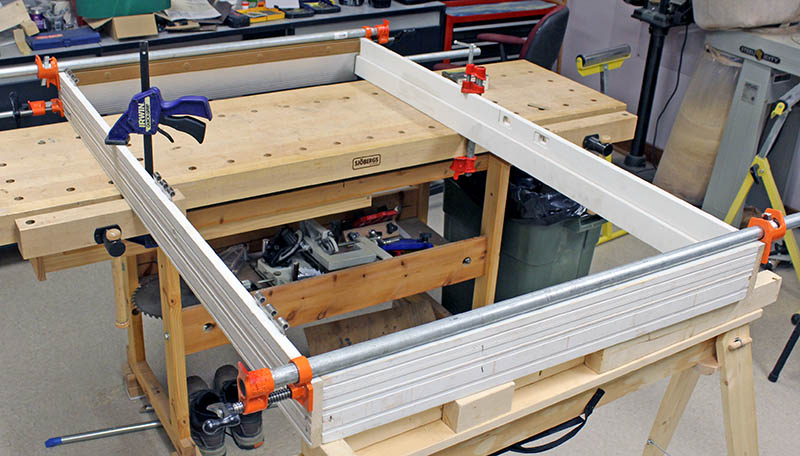
Last night Mike clamped and fastened together the two door frame side pieces and the top piece. Today he attached the bottom piece with the aluminum threshold.
Mike used pipe clamps to hold everything together, and clamped the side pieces to the workbench. After several diagonal measurements and adjustments to be sure the frame is square, he tightened the side clamps, applied Goop adhesive, and nailed the pieces together.
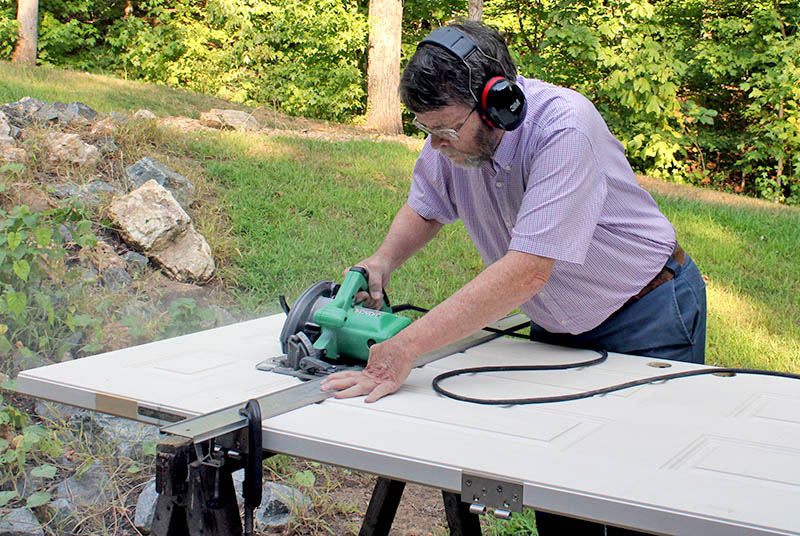
After careful measurements and double-checking, we laid the door on sawhorses outside the shop, and Mike sawed off 6½" from the bottom and 14" from the top. The task went well – the edges are clean except for a small area on the top where the saw got stuck momentarily.
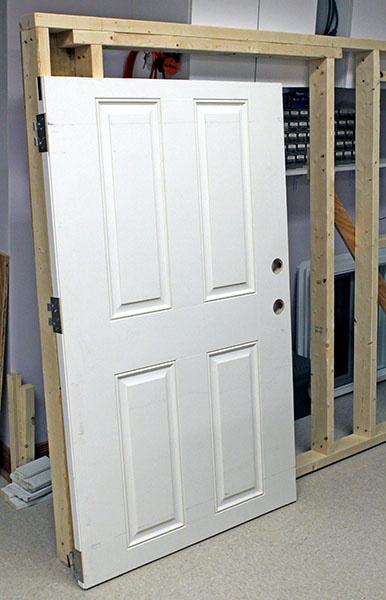
Here is the shortened door leaning against the wall into which it will be installed.
The remaining task is to salvage the wooden top and bottom "plugs" from the door cutoffs, then remove about an inch of foam from each end of the shortened door, and install the plugs there. We especially need to keep the flexible sweep that's attached to the bottom plug.

We hoped the wooden top and bottom "plugs" in the door cutoffs would be easy to remove, but they are not. Mike sawed the plug portions off the cutoffs, and tried to remove the fiberglass door skin from them. No way! The fiberglass is bonded with a super-strong adhesive, and was impossible to remove.
So Mike removed the flexible sweep from the bottom plug, and began cutting and planing 2x4 stock to 1½" x 1" to fabricate new plugs for the shortened door. Here is the original bottom plug with the removed sweep. Mike will cut matching grooves in the new plug to attach the sweep.
Mike spent much of the day fabricating wooden plugs, and preparing the top and bottom of the door for them. The wood he planed yesterday isn't long enough, so he had to splice two pieces together.
Mike sawed the ends of the two pieces to create a lap joint. Our "tenoning jig" – a seldom-used but very useful table saw accessory – made quick work of this after some careful measurements, adjustments, and test cuts. Here's a photo of the lap joint on one of the plugs.
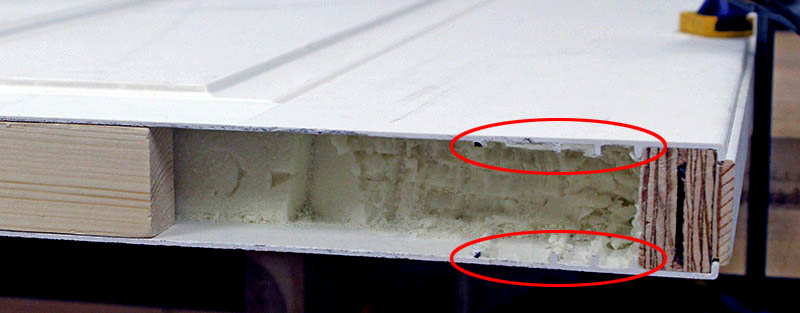
Next Mike removed foam from the door top and bottom to create cavities for the plugs. He used an oscillating saw to slice between the foam and the fiberglass skin, and to plunge an inch into the foam every couple of inches.The final step was to slide the oscillating blade under the foam and pop-out foam blocks. The ends of the cavities needed cleaning up with a screwdriver and a putty knife because the skin has ribs there (circled in the photo below), making the cavity too narrow for the saw blade.
This is the bottom cavity with a wood scrap standing-in for the plug. Mike cut grooves in the sides of the top plug to match those ribs. Tomorrow he will do the same on the bottom plug, then cut longitudinal grooves for the rubber sweep.
We have no photos of the progress Mike made over the previous two days, but he's been busy. He finished fabricating the wood plugs, sealed them against moisture, and installed them in the top and bottom of the door. Here's a photo of that accomplishment.
With the door plugs installed and the glue cured, Mike laid the frame on the workbench and installed the door on its hinges. It fits the frame quite well. We'll need to adjust the height of the threshold after the frame is installed in the wall, but we verified there's enough adjustment to make good contact with the rubber sweep on the door bottom.
Few updates for the past week, but Mike has been busy framing the end walls.
Originally we planned to build each 10' wall as a single assembly, but decided to split them into two sections because a 10' assembly crowds the working space. This worked out well, and today Mike built the final section – the east half of the south wall.
The wall framing is complete. Next we need to buy and lay vinyl flooring on the deck, then move the wall sections there, and erect them. We're not quite ready to do this, so next Mike will fabricate the roof trusses in the shop.
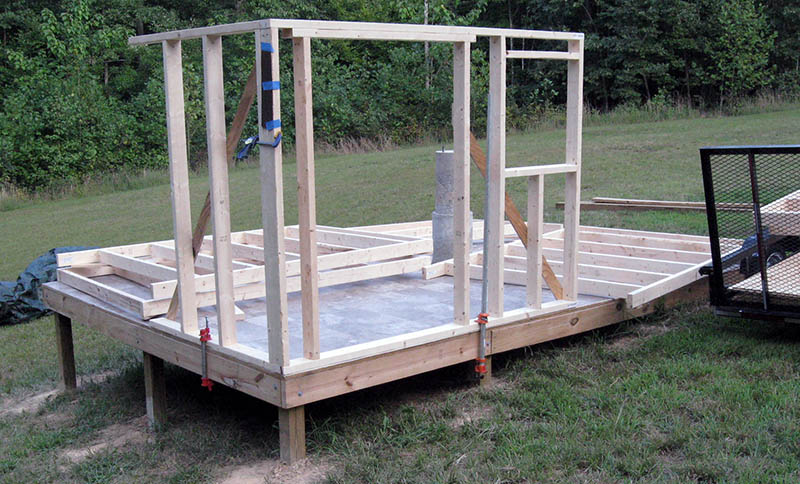
With the sheet vinyl floor covering laid, we can erect the walls. Mike loaded the eight prebuilt sections onto the trailer, and moved them to the observatory site.
Mike wanted to see at least a couple of wall sections in place, so he erected the two at the northwest corner. He clamped them in place, and also clamped them to each other for additional stability.
Next Mike unloaded most of the wall sections, and placed them on the deck in their approximate final positions.
It was getting late, so Mike covered the observatory and the trailer with a 19'x29' tarp we bought for just this use.

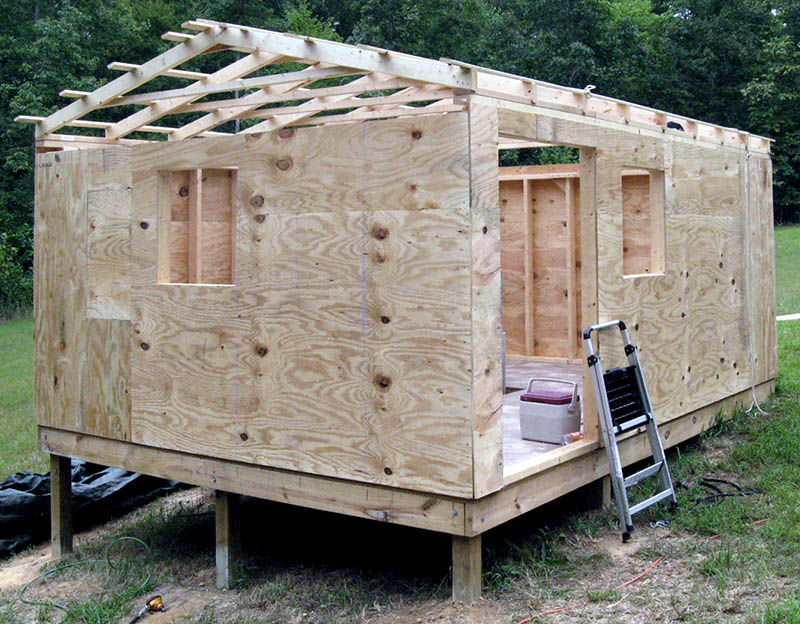
We spent four hours erecting the eight wall sections. First we dry-fitted everything by clamping the sections in place, then made adjustments where needed. When everything was correct, we nailed the sections to the deck, and to each other at the corners.
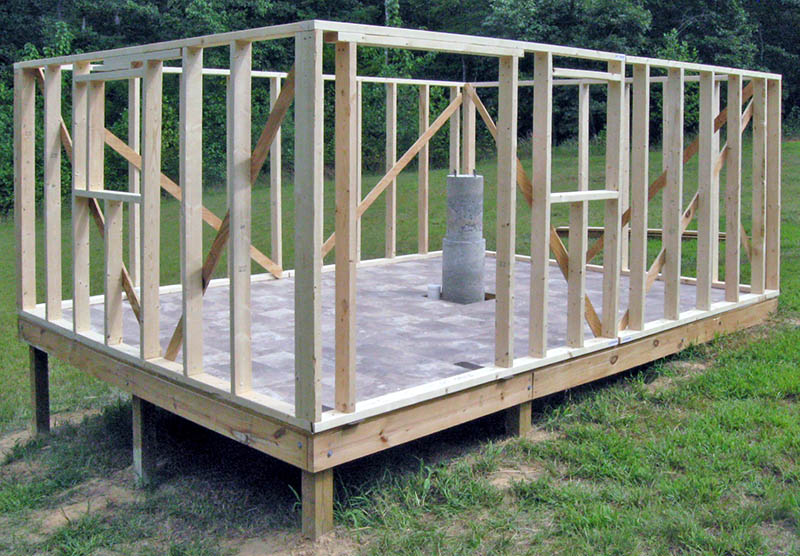
Next step: sheathing the walls. Once the walls are sheathed, we'll remove the diagonal strips that kept the wall sections square during transport and erection.
The final chore was to cover the structure with the large tarp, then the trailer and its 10 sheets of sheathing plywood, with a smaller tarp. Rain is forecast for tonight and tomorrow.
The large tarp did didn't work out. Rain collected in it, and it sagged to the floor. By the time we dumped the water off the deck, the floor was thoroughly wet. We used a large squegee and a push broom to remove the remaining water. Fortunately, the floor was unamaged.

We bolted a 10' length of pressure-treated 2x4 roof track on top of the east wall. The remaining 4' will be part of a second 10' 2x4 that extends beyond the north end of the observatory. A third section will make the track beyond the observatory 12' long.
We'll install the track on the west wall after cuting some long thin shims on the band saw. Once both tracks are in place, we can assemble the roof framing on top of them.
We spent four hours sheathing the east wall with 3/8" plywood in the photo below. It took two large and two small pieces to cover this wall that has no window or door.
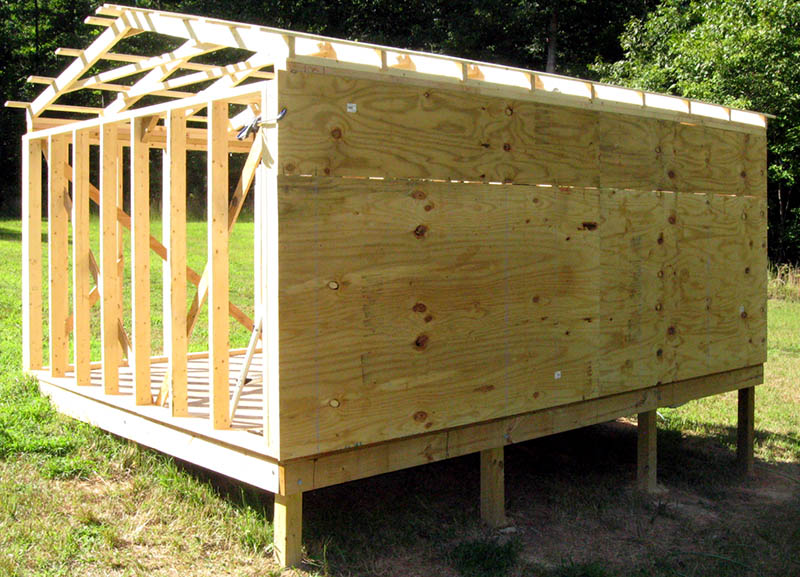
In the evening we came back and spent two more hours sheathing the south wall (open in the photo above).
We sheathed the west wall, with its door and window openings. Only the north wall needs sheathing.
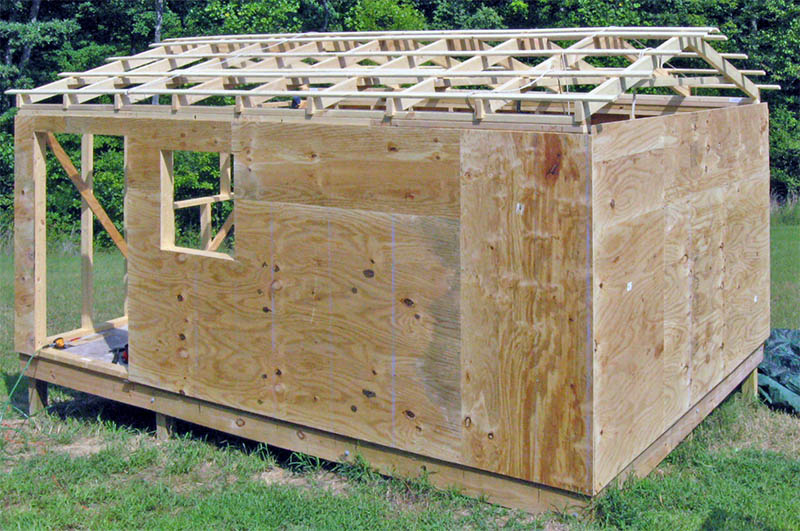
Today we sheathed the north wall, with its one window opening. Wall sheathing is complete, except for the two gable ends, which still must be fabricated and attached to the south wall and the north end of the roll-off roof.
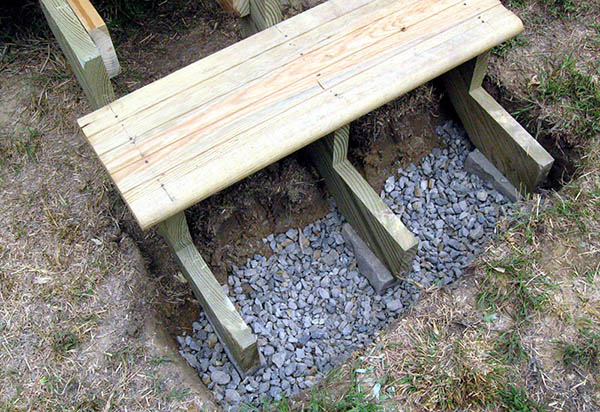
Taking advantage of an overcast sky (no hot direct sun), Mike installed the steps to the observatory. He had prepared the three stringers and four treads in the shop weeks before, so today's task was digging a level base and bolting the stringers to the observatory frame. Digging and leveling took a couple of hours, but the steps ended up at the right height, and level side-to-side and front-to-back. The stringers rest on concrete blocks sitting on a bed of crushed stone.
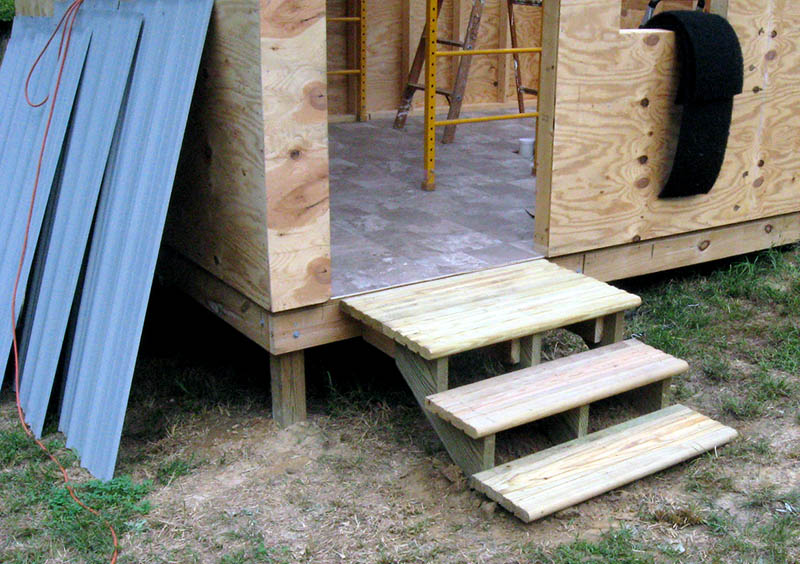
Mike backfilled the footers with dirt, and came back in the evening to attach the treads. The top step has two treads back-to-back to make a small "porch." During the shop work, Mike added extensions to the stringers to support the extra tread. Here are the finished steps.
Yesterday Louise took precise measurements of the walls, and made detailed plans for installing the Hardieplank lap siding. Because we'll first install trim on the four corners and around the door and windows, she concluded we need extra 2x4 studs in those areas to support the the siding ends that abut the trim.
We added those today, so now the walls are ready for house wrap and siding.
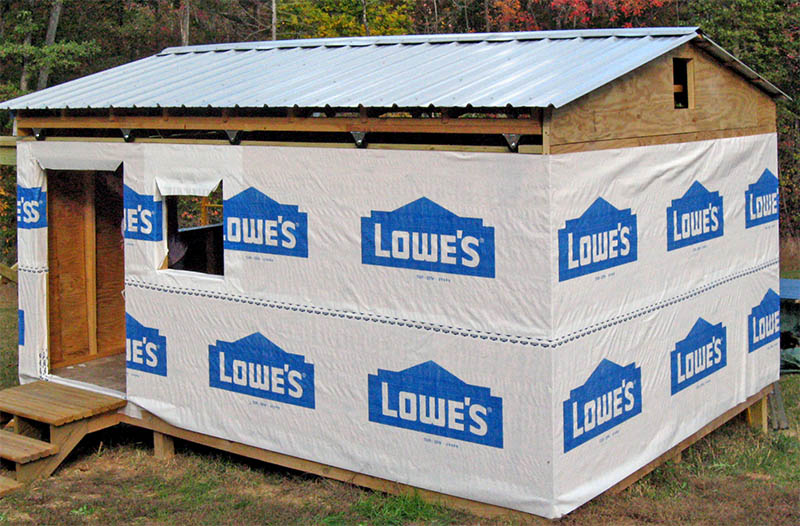
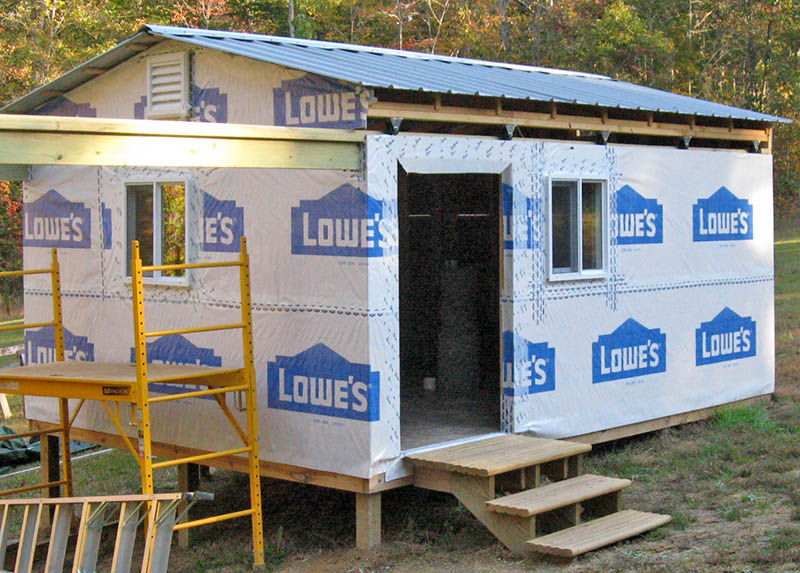
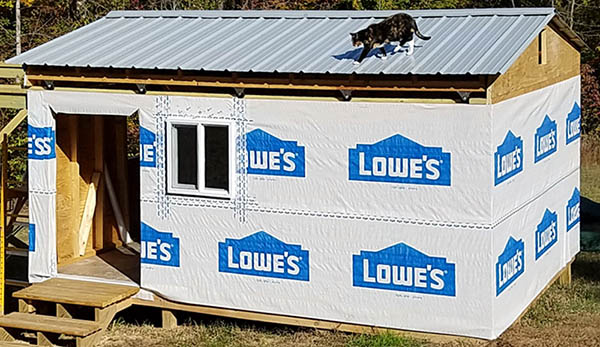
We spent four hours stapling house wrap onto the observatory walls. Only the south gable remains for tomorrow. Next we'll install the door, windows, and white PVC trim, then begin attaching the Hardieplank lap siding.
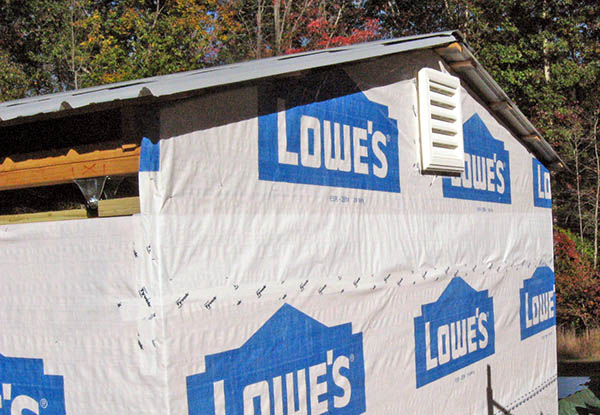
Today we installed the two windows and the north gable vent. Tomorrow we expect to finish the house wrap on the south end and install that vent, then install the door.
Then there's this....
Mike spent several hours attaching PVC brick molding to the door frame. Then he used the tractor to carry the frame to the observatory, where he verified it fits the opening in the wall.
However, today's primary task was to staple house wrap onto the south gable and install the vent. We accomplished this, but afterward we were too tired to begin installing the door – that's tomorrow's task.
We installed the door today, and the result is nearly perfect – all that careful work cutting-down the door and frame paid off. The frame required only minor shimming to make it level and plumb. The door swings easily, but doesn't open or close by itself.
Louise will paint the door and trim when she returns from a visit with a friend in New York City.
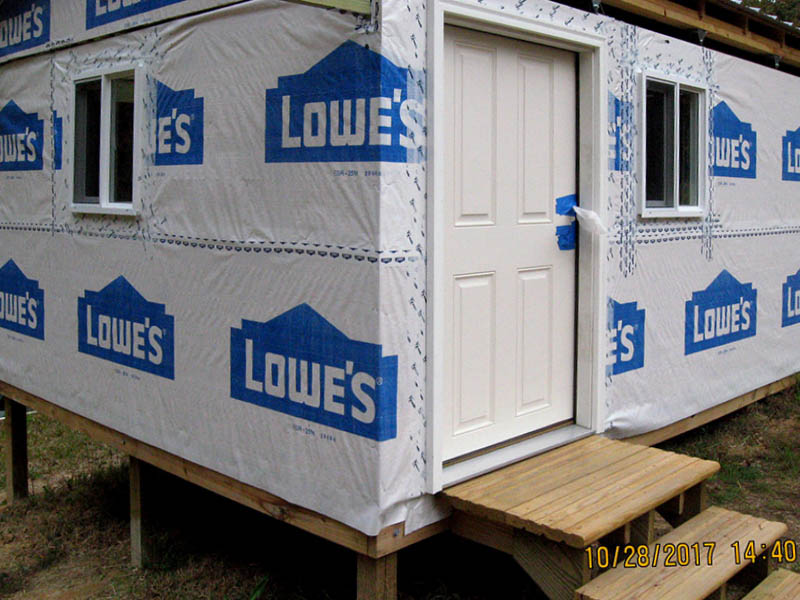
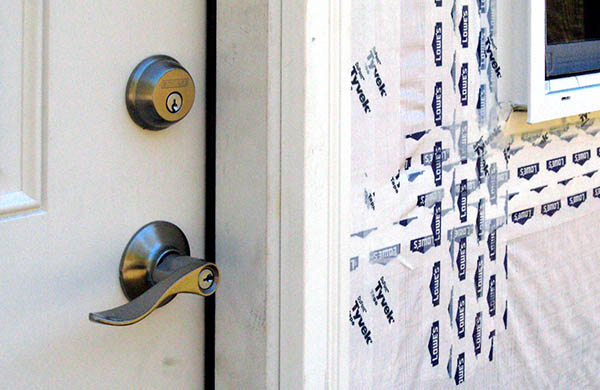
Mike installed the entry latch and deadbolt on the door. These will have to be removed for Louise to paint, but for now we can close the door tightly to keep out rain.
This completes work on the walls. Even though the next step – attaching trim – is technically "wall work," we pick up these tasks on the siding page.